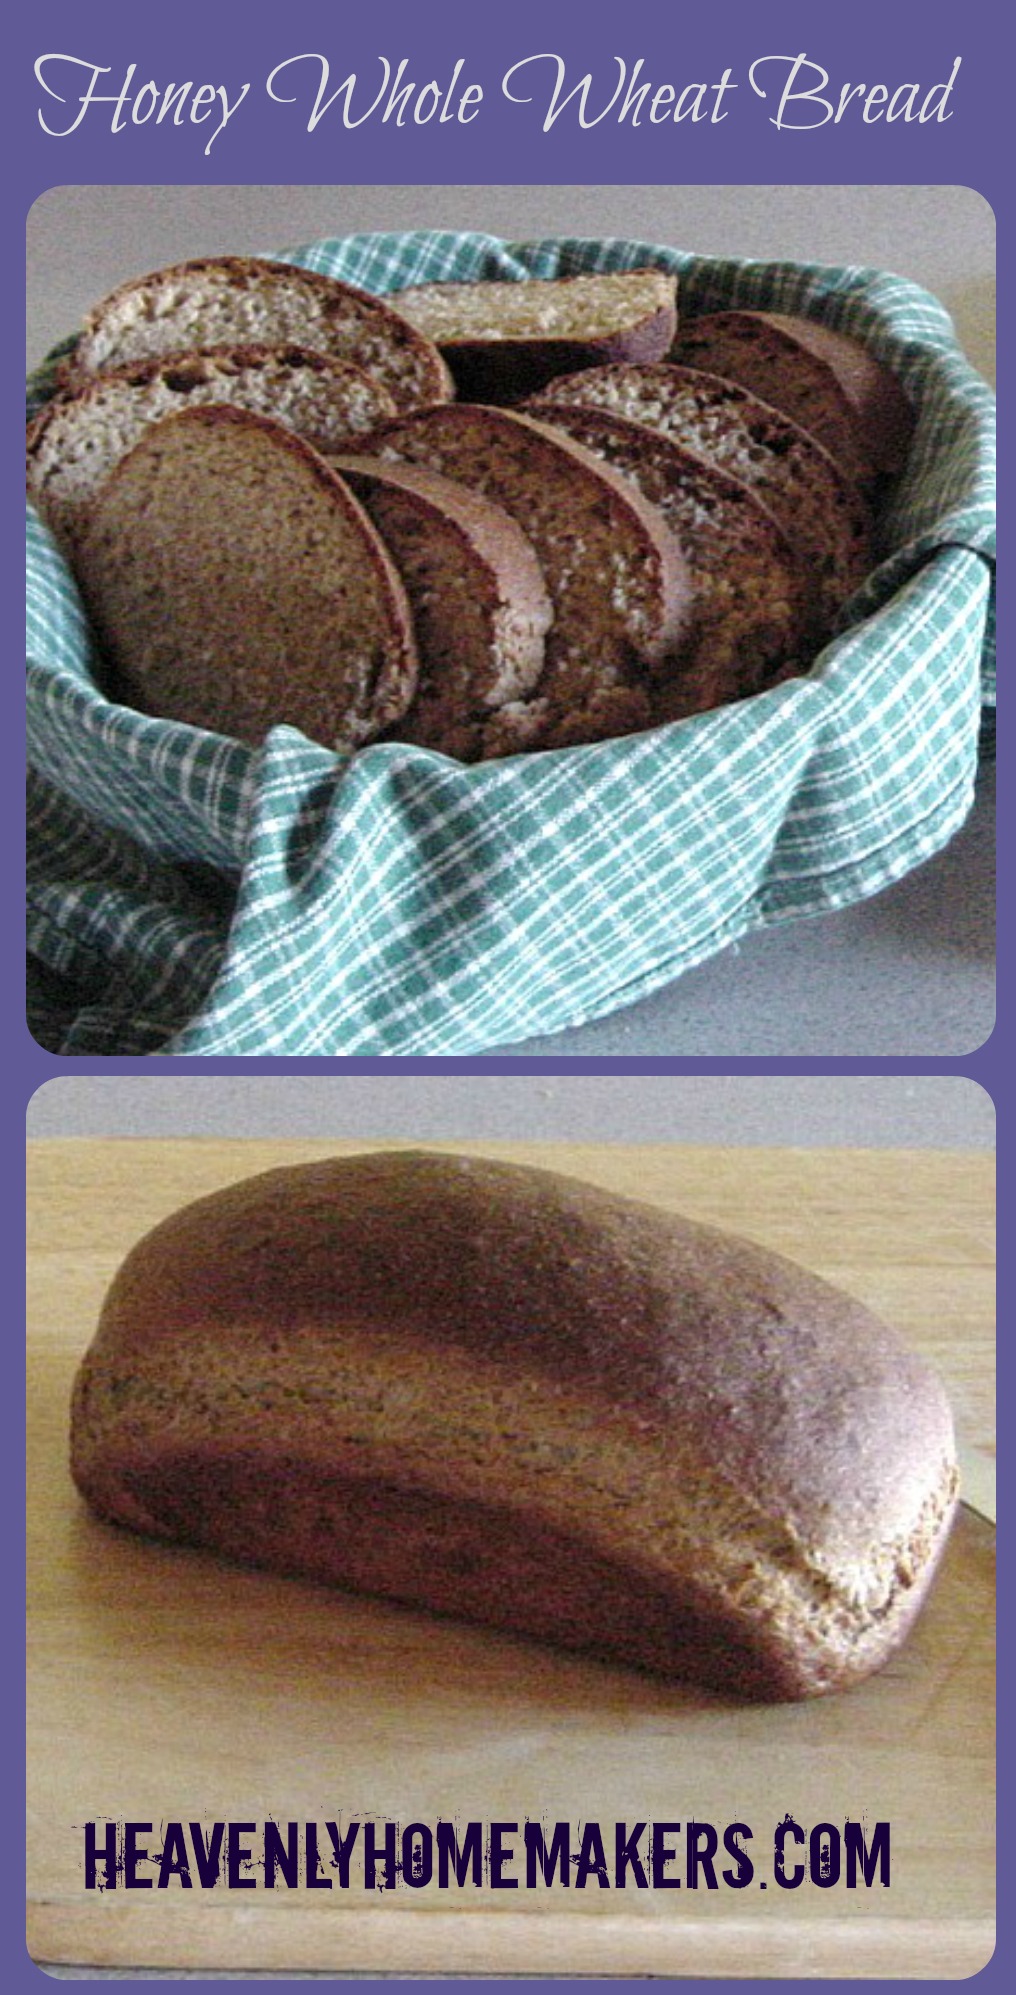
This is my favorite, simple 100% Whole Wheat Bread recipe. This recipe makes two loaves. (I always double it for my family, so if the pictures in this tutorial look like twice the amount, that’s because it is.)
Honey Whole Wheat Bread
6 cups (give or take) whole wheat flour, divided
1 ¾ cups warm water, divided
1/3 cup honey
1 package active dry yeast (2 1/4 teaspoon)
1 teaspoon sea salt
3 Tablespoons melted butter

Mix 3 cups of whole wheat flour with 1 ½ cups of warm water in a large glass bowl. Allow this to sit for about 30 minutes. This will break down the gluten and help the bread to rise better.

In a small bowl mix together ¼ cup water, 2 1/4 teaspoons yeast and 1/3 cup honey. Allow this to sit for about 10 minutes, or until the yeast is activated and mixture becomes bubbly.

In the meantime, melt 3 Tablespoons butter in a small sauce pan. Remove from heat and allow to cool. You don’t want the hot butter to kill the yeast.
Add 1 teaspoon salt, melted butter and yeast mixture to the flour and water mixture. Gradually add the remaining three cups of flour and stir well. As the dough becomes harder to stir, pour it out onto a clean counter and begin to knead the dough. If you create a nice dough before adding all three cups of flour…you don’t need to continue to add it in. Just add enough to make a nice, non-sticky dough.
Here’s a video to show you how to knead the dough. Two things: 1) I was having a freaked out hair day. So glad I could share it with you. 2) I’m pretty sure “wetter” is not a real word, yet I use that word toward the end of the video. I are sorry.
Don’t you love how I “spank” the dough at the end of the clip? There’s something very gratifying about giving the dough a nice “spank”. You should try it sometime.

Once you’ve kneaded your dough, place it into a bowl to rise.

Cover the dough with a cloth and let it rise for at least one hour or until it has risen to twice it’s starting size.

While you’re waiting for your dough to rise, get your bread pans buttered. You can also do some laundry, wash some dishes, or clean the bread dough out from under your fingernails.

There it is…doubled up.

Give the raised dough a nice punch.
(Punching? Spanking? Who knew making bread was so violent in nature?)

Using a floured hand, pull the dough out of the bowl onto the counter.

Knead for three or four minutes until the air bubbles are all gone.
Now you can watch how I shape my dough into loaves before baking. Again…more spanking…

Cover and allow 30 minutes to one hour to rise again. They should double in size, but the rising should happen more quickly this time because the yeast knows what to do by now.

See here how the loaves have doubled in size?
Bake the bread uncovered in a 350 degree oven for 45-50 minutes, or until the bread sounds hollow when you thump the top of it. (Great. Spanking, punching and thumping. I am really a bad influence.)

Allow the bread to cool in the pans for 10 minutes,
then remove it to finish cooling on a wire rack.

The bread slices more easily after it’s cooled. However…it’s awfully hard to wait…and bread fresh out of the oven slathered in butter is really, really good. I say go for it.
A few notes:
- Making bread from start to finish takes about 3 1/2 to 4 hours. Most of that time is waiting and baking time…but if you plan to make bread, you should block out an entire morning or afternoon.
- If your water or butter is too cold or too hot, it will kill the yeast. If you can put your (clean) finger in the water or butter and it doesn’t burn you, but just feels warm… you’ve got the right temperature.
- If the dough in your bowl has risen to double and suddenly you need to nurse the baby or wash cottage cheese out from between your toddler’s toes…just go punch down your dough and let it rise again before you shape it. It won’t hurt anything.
- If you want to shape your dough into loaves, but bake them later: Shape your loaves then put them directly into the freezer before they have a chance to rise. Allow them to sit in buttered loaf pans for several hours (or overnight) so that they can thaw and rise before baking.
- Many of you have asked if I have a bread machine. I don’t, so I’m sorry I am not able to answer your questions about them. I’m assuming this recipe would work in a machine, but I don’t know. Maybe some of you with bread machines can chime in on this?
Click here to read through posts describing and explaining grains, grain mills and grinding flour!

I have just finished making this bread! I really enjoyed the first slice warm with peanut butter. Funny that you posted this today I used another post that I had bookmarked (twice!). I cheated & used my mixer to do the kneeding for me while we got ready got school & it turned out well.
Laura – , You have inspired me to start making more stuff homemade :-) i am really enjoying this , not that i did not make most of my stuff homemade before but i am starting to make even more your website is fantastic and i just wanted to say THANK YOU especially for this bread turtorial GOODBYE BREAD MACHINE
:-) !!! i am canning peaches today got a great deal 30lbs for $15 from one of our local farms.
Thanks for the tutorial! Do you leave the dough to soak overnight usually? (The whole phytates thing….)
This particular bread recipe does not call for soaking overnight…therefore the phytates will not be broken down. Breaking down phytates requires soaking the grain in a cultured dairy product or lemon juice.
This recipe is sort of a compromise recipe. While it isn’t the healthiest ever…it’s at least way better than store bought! :)
If I wanted to have it soak overnight, could i just add a bit of lemon juice? would that help it break down? and then could i continue on with the recipe in the morning?? thanks
You could try that, although you could only add it to the initial flour and water mixture. The remaining flour you’d add the next day wouldn’t be soaked…but at least it would be better!
I am so glad you posted this. I just bought some yeast today and was gonna look up recipes NOT using a bread machine. I am so happy now.
Was this a multi-step process to get the videos made? I just asked since it looks like you’re wearing three different outfits, but you didn’t get yourself dirty! I wish I was that talented. :)
Thanks for the tutorials!
YES!! I wondered who would notice my change of clothes! I did the picture taking a LONG time ago wearing the tan sweater. Then I had my son video me kneading bread several days ago…maroon shirt. Yesterday, I made bread again and had him video me shaping the loaves…corduroy jacket. I didn’t think about him videoing me shaping loaves the day we videoed the kneading. Silly me. :)
Thus…three different changes of clothes.
I l-o-v-e making homemade bread. It’s like therapy to me. I like your video demos. Very well done. I especially like your loaf shaping technique. I’m from the old school of rolling and then shaping. I think on baking day I will give your method a try. Thanks for enlightening me.
~Mrs. M
Thanks for the tutorial. this is the only way I learn by watching!! I now figured out why my bread (your recipe wasn’t coming out right) I need to KNEAD it longer.
Can’t wait to hear more about the grinder. I am still on the fence about buying one. I have been doing so much baking lately and putting away baked goods for after the baby, that I am thinking I just might get one.
As silly as this may seem……the thing that impressed me the most was how you didn’t get any flour on your shirt!
signed,
the messy cook;)
When I used to bake bread with my breadmaker, I was never happy with the really tall loaves. So I made my bread using the dough feature. Then when it was finished, I would pull it out, shape it to fit in my loaf pan, let it rise, then bake at 350F for 30 minutes.
This was a great tutorial. Thanks.
Can you freeze the loaves? Do you do it after you have baked them or before?
Thanks so much for your blog. I have learned so much from you and love the humor you add to life. :)
Yes, you can freeze the loaves after you bake them…or before following the directions in the bullet list above.
This is excellent! Is it OK if I link to it from my blog? Folks are always asking me about “how to,” but have no way to video it.
I didn’t know about soaking the wheat before adding other ingredients. That’s helpful advice! I use SAF yeast and don’t really have any trouble with the rise, but have heard others who do. Thank you for sharing this excellent bread making tutorial!
Sure…link away!
Thanks for the recipe…and instructions! I made it this afternoon. It was delicious — I had some directly out of the oven. Your loaves are DEFINITELY “prettier” than mine, but stilll…I was very pleased with the texture and taste! I’ll work on the prettiness! ;)
HI Laura,
Is there a reason you don’t use a bosch to make your bread? It does all the kneading for you & you can make 6 loaves of bread at a time.
Oh yeah….I just don’t have one. :) If you DO have a Bosch…GO for it! Saves a lot of muscle from what I hear!
Thank you soooo much for this tutorial!! Now, time to attempt another batch of bread tomorrow….
I have tried a few times with yeast breads and was starting to feel like I wasn’t meant to bake my own breads but after watching your tutorial (Thank you!), I decided to give it another try. WOW! My husband and I just had a slice, fresh out of the oven with butter and OH. MY. GOODNESS. Store bought bread? Never again. My dough was a bit more dry; I used King Arthur White Whole Wheat and am not sure if it’s different than grinding your own and thought it might not come out but it ended up being great. Thanks again for the videos! :)
THANK YOU for this recipe I am going to have to go make some now… I just bought some raw honey from a local gal who is in the same poultry group and I was wondering what I could do first to help me bust open that big ol jar I bought… HA HA and just think I stopped by here and you have a RECIPE!
This was very cool! I had mastered making white bread years ago and have since learned more about healthiness. I don’t even want to do the 1/2 all purpose/wheat recipes that most wheat bread recipes call for.
However, and maybe because I just need to practice more, but my dough does not seem as smooth and elastic, even as yours looks on the video. I’m amazed that you can knead it on what appears to be a non-floured surface the last time around, without the dough tearing or sticking. Yours appears still lighter, while mines seems so heavy.
Could you post some trouble shooting? I mainly need to know if I’m kneading and the dough is tearing and seems to rough but it’s still somewhat sticky, does that mean I just need to keep kneading without adding more flour?
Also, I have used whole wheat pastry flour for other things, what do you think of it? I may try it for bread soon.
I love the videos. Very helpful.
:)
Great post! Thanks for sharing.
I thought it was interesting that you soak your flour before you make the dough. I have always used gluten to help my bread rise more effectively. Then I don’t have to wait the extra half hour. Have you ever tried that? How does it compare with soaking flour? Thanks for the video.
Hi! I found your bread tutorial today and I am giving it a shot… I cleaned the dough from under my nails and am using the “rising” time to read your blog; love it :) Anyhoo…about the bread. My dough was so stiff and dry that I was unable to even work the whole 6 cups of flour in. Any ideas why? I did use King Arthur whole wheat flour and I noticed someone else had mentioned that. I double checked everything else and all other quantities were ok. My dough was nowhere near as soft and pliable as yours on the video. I am hoping it will bake up ok. we’ll see. thanks for any suggestions that you might have.
I tried this recipe for the first time, using King Arthur whole wheat as well, and had the SAME problem: the dough was quite dry/heavy, and I only used about 5 cups of flour because by that time there was already flour in the bowl that wouldn’t stick. Growing up, we made bread with freshly-milled flour in the Bosch. I don’t have one (yet!), so I do the old-school big with bowls. The taste, texture, and crust of this bread were great, but the loaves were pretty squatty and a little too heavy. I’d love your thoughts.
I was so excited when I read your recipe. I was looking for a whole wheat recipe that only used whole wheat. (I can’t read half of what I’ve typed so hopefully it’s not full of typo’s) i chave fallen in love with your website. I has inspired me to get back to my home making roots. I’m back to cooking more. So today I looking for a whole wheat recipe, but most of them call for white flour as well. hen I thought of your site. Sure enough you had one :) Just like Melanie, I used Bob’s Rd Mill flour and didn’t use half of what was called for in the flour, because my dough was dry. It also doesn’t seem to be rising as well as it should. My Grandma always said to not make bread on a rainy day b/c it wouldn’t rise right, and today is damp and overcast from rain storms.My gGrandma always told me to test the liquid temp the same way you test a baby bottle- the inside of your wrist. If it ‘s okay then your yeast will rise. I know my water was warm and my butter cooled, but I’d never heard about too cool. That may have been my problem too, b/c I was making a number of meals today as well. Thanks again! I hope it does rise some more. Your site is one of my favorites now. :)
I just had to come back and say… it was slow rising but it rose and was delisious!It was dense but not heavy if that makes any sense. Thanks again!
Hey Melanie!
I used KA’s wheat too. I had a hard time as well, and I had just mixed the 3 cups. I just added more water, and continued to add the flour. I figured it had to do w/the climate. I now know what everyone was talking about “dense” bread. It was a little dense. But I toasted it, and it
was aok!
Thanks for the recipe and tutorial!!!
I noticed that you used loaf pans made from different materials. I only have glass pans, do you have a preference?
I like my glass pans just fine, but I REALLY love my stone pans!!
Laura,
When are kneading the dough and adding flour, is that flour in addition to the 6 cups in the recipe?
Thanks Jenny
Generally it is flour in addition to the six cups, but it depends on the type of flour you use and the climate where you are. So, just add it until it is the right consistency. :)
HI Laura,
My friend forwarded me your blog and I love it. I’m only been reading it for about a month but I got a grain mill! Which leads me to my bread question. I’ve tried my original recipe and your whole wheat recipe and neither has worked out.
Do you have any ideas why it wouldn’t rise? My yeast is good…I used both hard and soft red wheat berries…I went on to the http://www.thefreshloaf.com site and read some conflicting info. Some people let their ground flour sit for a few weeks/months and some say use it right away. What do you do?
i don’t want to add gluten, if i dont’ have to.
Help!
I use my ground flour fresh. Everything I’ve read says that it’s much healthier that way.
I’m not sure why your bread isn’t rising. Is your yeast getting all bubbly when you mix it with honey and water? If so, that means your yeast is working. My only other thought is that maybe you need to let your flour/water mixture sit longer than 30 minutes to really let the gluten release.
Wish I could be more help!
I use all 3 types of wheat (hard red, hard white, and soft white).
I have learned through trial and error that you can’t use soft
white berries for yeast breads. It’s only good for quick breads,
desserts, and the like. I use a great christian homeschool family’s
co op for my supplies and they have a great recipe for whole wheat
bread that I’ve used forever. It does have a few other ingredients
though. http://www.breadbeckers.com is the website and they have a great
forum you can join for free and be able to free a ton of great
recipes and get tips on your baking as well as questions answered.
Hope that helps. Keep trying you’ll get it! Don’t give up!
I loved your video tutorials – you are hilarious! It’s 10:30 p.m. and my family is asleep, I thought I was going to wake them up laughing (at your spanking the dough :) I can’t wait to try your recipe. I recently purchased the More-with-less cookbook and was going to try a whole wheat bread recipe in there. But yours looks so easy, I’m going to give it a try. Thanks for the info, you did great!
Tried this, but my yeast must have been bad. I was so disappointed, it didn’t raise at all :(
I really like this site…i was searching for healthy good cinnamon rolls on google and saw your site. I’ve been looking through some of your recipes and I really like the pictures and they look so good! I’ve bookmarked you so, when I come back to bake and try new recipes I know where to come. Thank you so much!
I made this bread a couple of weeks ago. On the second day it tasted yeasty though. Again, I will try letting it rise a lesser time. I made it by hand since it was my first time. Next time, I will use the bosch mixer with only one rising. I will post how that goes.
Thank you SO much for the tutorial. My 2nd experience was much easier than the first. I just kept it well-floured and didn’t have the frustration of dough all over my hands. Thanks!
I lately came across your blog and have been learning along. I thought I would leave my first remark. I don?t know what to say except that I have loved reading. Nice blog. I will keep visiting this blog very frequently.
Laura,
I am a brand new blogger, so I’m not sure what the protocol is for copying other bloggers, linking to other blogs, etc. I just put your bread recipe on my blog, is this okay??? I did talk about your blog and put a link to it. Please let me know if I did this wrong, or if I should have asked FIRST, before publishing! I really want to learn how to do this right! (BTW, your bread is fabulous.)
Lori
Laura – I just made this today but i subbed 2 cups of Bob’s Red Mill Organic high fiber cereal for 2 cups of the ww flour – i think it’s pretty good. I made one loaf regular and the other a cinnamon swirl (which my mom used to do with yummy bad for you white flour, lol) and they both turned out pretty good. my only comment is that i needed to put the loaves on top of the turned on oven to rise properly and then i really only needed to bake them for 30 min – i left them in for 40 because i thought 30 seemed to short, but they are a little browner than i would like now so next time i know. my oven does tend to bake faster on most things but only by a few minutes so i was surprised they were done so fast.
I am having fun trying all your baking recipes – did the graham crackers and next up are the soft pretzels and the bagels. Thanks!
Thanks so much for this recipe. I have been making it for a while and it is great to know my kids are eating good stuff! And, wow, does the bread taste great. My son just saw your picture and said, “Boys rule in their house too!” (We have three boys and one girl.) Your blog is such and encouragement to me!
Thank you SO much!! I actually made bread earlier today, and as always, my loaves are so flat and heavy. Of course, my wonderful husband said they were great, but I want to make more to use for sandwiches, and those just aren’t as good on 2-3″ tall bread. :P So, THANKS!! Got the info I was looking for. Looking forward to trying this one tomorrow… along with the whole wheat doughnuts.
Thank you. I even blogged about this, I was so happy with the way my loaves turned out!!! The address is:
http://thejuniorclarks.blogspot.com/2010/01/baking-bread.html
if you care to read it.
Thanks again!!!!
Ok, so my brain doesn’t get fried trying to figure it out… is this recipe for four loaves or one loaf?
And if it’s four… what would the recipe be for just one loaf?
oy… never mind. I just re-read the first sentence!!
I totally love that you ‘spank’ the dough after you get done kneading it. I have always done that and, until now, I thought I was the only spanker. Gratifying indeed!
Laura, I just noticed, you have two different measurements for yeast. Is it 2 1/4 tsp or 2 1/2 tsp?
I have all the ingredients, and I’m set to bake bread this weekend. I think I’m going to try 1/2 all purp flour and 1/2 ww.
And lo-and-behold, the honey WAS w/the pb&j!!
Ah, sorry…2 1/4. I’ll go edit that. Thanks for pointing it out! SO glad you found your honey!!! :)
Thanks so much for this recipe! My loaves turned our perfect and sooooo delicious. I used half regular whole wheat flour and half whole wheat pastry flour (ground a little finer). Wonderful! Bless you for your efforts in keeping us close to what God intended us to eat in a yummy way!
Hmmmm. I got done w/the kneading and it’s currently rising. Is it suppose to be kinda crackly or should it be ALL smoothe?
I should also say I had to add more water it was really dry after three cups. I probably ended up adding over a cup of water.
Yeah, most will have to tweak the recipe a bit like you did based on different kinds of flours, different climates, etc. The crackly or smooth thing? Same thing…yours is going to look different than mine. I’m sure yours is just fine. Can’t wait to hear how it turns out!
Yeah I wasn’t sure, but figured it would be ok to add water.
The crackly thing freaked me out lol. I ended up rolling both loaves out, one I made the honey wheat (half all-purpose, half whole wheat), the other is the cinnamon swirl. I wasn’t about to try and
shape a loaf on top of making bread for the first time lol.
I have to say, the kneading part wasn’t as scary as I thought it was
going to be! Both loaves are in the oven as I type, so I’ll let you know when they are done!
Well bread is out of the oven, and cooling. the one loaf cracked (the honey WW one) the cinnamon looks pretty lol. Hopefully I’ll get better at shaping them. They look a little weird lol.
Well, i couldn’t wait any longer lol. The crust is a little dry, but the inside is pretty moist! So I guess I did aok for the first time making bread!
Yay! Good job. I knew you’d do great!
Thanks Laura!!! I wasn’t so sure earlier.
Laura!!! I wish you could come to my house and show me how to make this bread. I did another 2 loaves over the weekend. My dough never gets smooth like yours. It’s kinda like in pieces? Then I mix it into a ball, and just looks like a mess. I dunno, but maybe the next time you make bread you can make a video of the beginning of the bread making? maybe I stop mixing too soon or something.
I kind of gave up on it on Saturday. I barely kneaded it, it was so wet (I added too much water) and kept on adding flour (when I was kneading it, can we say I used OVER half a 5 lb bag!!!!) and it just wasn’t working. BUT I did end up baking it, (still rose and everything lol) and it still tastes good. I guess bread is VERY forgiving!! lol
Yumm! I just had a bite of this bread after pulling it out of the oven 5 min. ago. So good! I made the cinnamon variety and through some raisins into mine as well. This is my first time baking bread and it was a major success! The video and pictures really helped me, just written instructions can be really overwhelming when you have no clue what your results should look like. At first I thought I was doomed, my dough looked nowhere as pretty as yours and was falling and flaking apart all over the place but at the end it came together and my loaves looked pretty official when I pulled them out of the oven. I’m excited to have my boyfriend try this, hes convinced he doesn’t like whole wheat and I think this will change his mind. Thank you!
yah, my loaves weren’t pretty either!! I thought I did something wrong. but i watched her video again, and in the beginning her loaf looked like mine. I just need to mail my loaves to laura to make them pretty lol.
I am a new bread maker here. I have tried a few other recipes and this one is the first one that I have tried that has turned out. I know practice makes perfect so I will keep trying.
I use my bread machine to mix all of the dough for me, then when that was done I let it rise like normal!
thank you!
I want to try this using my bread machine’s dough settings. Do you have any suggestions? Changes to the order or recipe? Thanks!
Hey Laura!
I made this bread today and had a bit of trouble. The dough was really stiff and hard to work with, and didn’t seem to rise very much. I could barely knead it, and it baked not looking very pretty. However, it tastes delicious! I’d love to know what I messed up. Any suggestions?
Well, I’m so glad it tastes good! Maybe try using less flour next time. Bread does differently in different climates and with different kinds of flours. I use freshly ground flour from hard white wheat and it usually does well for me.
Laura, Hi there fellow Nebraskan! Do you have a version of this that you soak? My husband recently got me a Grain Mill (a Family Grain Mill) and last night he ground me up about 21 cups of flour which got put to soaking last night in various concoctions ::smile:: and today got put to good use in Muffins, Crackers, Tortillas and Bread. We had to grind the flour twice for a finer consistency (I would have personally liked it even finer but oh well, maybe next time) My bread that usually does great barely rose. I proofed the yeast, but I didn’t add vital wheat gluten…should I have? It tastes fine and is moist but didn’t get tall like when I use Spelt. Any Suggestions for baking with fresh ground whole wheat??? Your breads always look so perfectly scrumptious!
Sounds like you’re having a blast with your grain mill!!! I don’t have a good soaked version of bread…just the sourdough (which you can read all about here: https://www.heavenlyhomemakers.com/category/sourdough-starter)
What size loaf pans do you use for this recipe?
I use 9″ loaf pans.
Just made this for the first time today and it’s very tasty! I think I need to reduce the flour a bit next time as it was hard to knead and a little dense, but overall it came out just fine. Thanks so much for the recipe!
My question is, how do your store all your yummy fresh baked breads that you plan to consume in the next few days to a week?
I put the loaves into a freezer bag and put them into the freezer after they’ve cooled completely.
I made one batch of this bread and it turned out great! I want to make more, but just discovered I am almost out of butter (EEK!). Can I substitute oil for the melted butter?
Yes, you can use oil instead, no problem!
Hi Laura :) Is there any substitute for the honey? Could I use rapadura sugar instead or make the loaves without the honey? Thanks!
Yes, you can use rapadura instead. It just may give your bread a more molassessssssssy (I don’t know how to spell that word, obviously) flavor. :)
Hi! I tried your recipe last night, this was my first time making bread EVER! I had to tweak the recipe a bit, my boyfriend can’t eat whole wheat so I changed it to bread flour. I know it seems strange, but I’ve tested him by secretly slipping whole wheat in and he really does get sick from it.
Anyways, the bread is still very good…. but it didn’t rise very much and is quite dense and heavy. Do you think this happened because I used a different flour, because I used sugar instead of honey (didn’t have any honey), because I switched from butter to oil, because my yeast was older or I didn’t let it rise enough? HELP!
Anyways, it still tasted yummy and I had a piece fresh out of the oven with butter all over it. I’m going to try again so any suggestions are much appreciated! Thanks :)
Hmmm, well first – great job making bread for the first time!!! :) Part of the “problem” with the bread being dense could just be that it was your first time and it seriously does just take some time to get used to making bread. Every time I make bread, it turns out better than before. You may not have kneaded it long enough. If it didn’t rise very much then yes, your yeast may have been old or just not activated enough.
So glad it tasted good anyway…I say keep working on it and it will get better each time!
And maybe try differen’t yeast!
This recipe is PERFECT! Thank you so much! I’ve always wanted to make fresh whole wheat bread for the family, it smells delicious when it is baking and is a healthier twist to the regular old bread loafs at the supermarket. thanks!
Haha! I think you have my same 2 glass loaf pans. I used to wish i had new ones but I love my one skinnier loaf and one fatter!
I just found your site and am LOVING it! I’ve made the pizza pockets and now this bread. We just almost ate a whole loaf right out of the oven. So yummy! Thanks for sharing!
So when you double it do you double the yeast? This is a question I have always had about doubling bread recipies do you double the yeast or do you not?
Yes. Definitely, *definitely* double the yeast as well. The poor little guys have twice as much work to do now!
But seriously, if you don’t, your loaves will be dense as anything. :P
What is the difference in baking in a stoneware vs. glass loaf pan? Do you have a preference? I need to buy a few pans as I only have 1 metal pan. My girls don’t like the crust really hard and crunchy.
I like baking in stones better…I have no idea why! I think stones make the crust less crunchy, although I think it is similar in glass.
if you half/double the recipe do you half/double the bake time? pardon me, i am a novice :]
Nope, keep the time the same if you half the recipe. :)
Can instant yeast be used for making bread? The package instructions say it can be directly mixed with flour. I am a bit confused? Never baked breads before. Should I reconstitute in warm water first like normal yeast? Please help me.
I think that the yeast I use is actually the instant also, but I still activate it in the honey/water because I like the result. I suppose you wouldn’t have to though!
She is correct. You don’t have to activate it ahead of time. I use instant yeast all the time for making bread. Just throw it in with the flour, and it’ll be fine. Happy baking!
The directions on my instant dry yeast say to avoid direct contact
with cold water and to stir with flour for 30 seconds.
Will stiring it in with warm water and honey cause problems?
I’d like to follow your recipe exactly because my dough seems so dense
and small. Not nearly as satisfying to spank! :)
p.s. LOVING your website. I know I’ll be here often.
I really think the warm water/honey will be fine. It really is nice to spank the dough. :)
When I made this bread for the first time (actually this was the first bread I made ever) it turned out ok but it seems very “grainey” do you have any suggestions? Is it maybe the wheat I’m buying? I’m going to try it with whole white wheat this time….do you know if I could put the wheat flour in the blender to maybe not make it so grainey? And I just love your website, it has encouraged me to make more “homemade” items. You are really a BLESSING in my life! Thank you! ;o)
Well, when I grind my own flour, it does get pretty fine. You could try the blender idea. And YES, do try using white whole wheat (instead of red) to see if that makes a difference. We love white wheat so much better than red wheat!
Okay, I bought a used wheat grinder awhile back. And I must admit that although I cook and bake quite a bit, I’ve never used it. I feel stumped knowing how to. White wheat, red wheat, soft wheat, hard wheat. I just don’t know where to start. I decided I MUST get unstuck. SO, can you tell me about wheat grinding. Are there any tricks or differences in used regular store bought flour and grinding your own? Does it really matter if it’s red, white, soft, hard etc?
As I have looked through your recipes (which look great!) I haven’t seen where you have used the flour within 10-12hrs…I thought that was important for the nutrients. As you can see I am full of questions. If you know of a good site, cookbook etc that would better get me started, that would be appreciated as well.
Blessings,
Twila
I don’t always use my ground flour within 12 hours, but I freeze what we have leftover to have available for quick recipes. As far as your other questions go, you might find these posts helpful: https://www.heavenlyhomemakers.com/category/grains-and-grain-mills
whew! i have been trying to make this since i posted the last time (oct 1st)
the only thing i have trouble with is getting the dough to rise the SECOND time in the loaf pans. isn’t that strange? is there a reason for this or do i just need to work at it more? after all i have never made bread before this.
Hmm, I’m not sure why it wouldn’t rise in the pans if it already rose in the bowl. Have you tried putting the pans in a warm place? I’ve even heard of putting a cloth over a heating pad and setting your loaf pans there to get the rising to happen.
One thing I do in the winter to help the yeast is turn the oven on to “warm” for a few minutes, turn it off, then let my bread rise inside the warm oven. Works like a charm. :)
I have this cool (warm) wood stove that we heat our home with in the
winter. I place a couple pans upside down on the top on the wood stove and then put
the bowl of dough or bread pans with dough to rise on there…covered with
the towel. Dough in bowl usually rises in 40 minutes and dough in bread pans
30 minutes. In the summer I bring dough to rise to the warmest place in my home.
Warm is good! Great website and good humor, Laura!!
I also let my bread, pizza dough, everything rise in a warm oven. It works better there than anywhere.
Well thanks to Glenn Beck we tried making our own wheat bread turned out great. We grind our own wheat stifted it and then made the bread by your recipe Love it.Great with honey butter. neighbors love it too.Will be making more for Thanksgiving Dinner. Thanks for your tips.
I just wanted to share that I did a price analysis on homemade vs. store bought bread. According to this recipe and azure standard prices for all organic ingredients except the water (and the butter isn’t organic in this pricing, but my local health food store sells the organic butter cheaper than $4!), the total per loaf comes to $1.19. That’s $2.46 less than the leading Rudi’s Organic Sweet Whole Wheat bread.
You can save almost $15 on 6 loaves of bread. Plus your homemade bread is much tastier.
Could this recipe be modified for use in a bread machine? I have Rheumatoid Arthritis and can not knead the dough by hand.
Cammie
I would imagine so, but I really have no idea because I’ve never ventured into learning a bread machine.
Cammie, if you have a kitchen aid mixer you could use the dough hook and knead it with that.
I have great results that way!
@McKinsey, can you give a little more detail about using this
recipe with a Kitchen Aid?
@Laura, awesome site! I have 3 boys (5, 5, & 2) so being in the
kitchen alot is a must lol as i am sure you know :) I enjoy reading
your tips & ideas. Thanks so much for sharing your information,
ideas, & recipes with us.
Hi! I have made lots of bread in my machine…then my machine broke and
I found Laura’s recipes. Just find your machine’s cook book and add
the ingredients in the order that it calls. 6 cups of flour will fit
in the machine to make dough and then divide to rise and bake in pans.
You can cut this recipe in half and bake the bread in the machine.
Made this a few days ago and it is the best homemade bread that I’ve every made. I’ve tried a lot of recipes and finally resulted to buying my bread at a local bakery for $5 a loaf. The ingredients listed on the package are the exact ingredients you use. I won’t be needin’ to buy that $5 bread anymore because this is even better! I’m making another batch as we speak (for the freezer!)
Speaking of freezing….do you freeze your bread after you’ve cooked it and does it still taste the same???
Yes, sometimes I freeze it after it’s baked and cooled. It’s not quite as good as when it’s fresh, but it works pretty well!
When increasing recipe & need to bake in 2 batches how to bake 1 batch without 2nd over rising in pans?
I’m not sure if I’m understanding your question correctly, so forgive me if I don’t answer correctly. When I double the recipe, I just use four baking pans and bake it all at once. I have a large bowl to mix up the double batch in. I just do two batches at once.
I see that no gluten has been added to your recipe. I just got a grinder for Christmas (wa-hooooo!) and was told by a friend that you need to add gluten flour when grinding your own white wheat. I’d love to hear your thoughts on this. I made cinnamon rolls after I opended my grinder and they did seem less flakey or stretchy than usual. Anyway I just want to thank you as well because you are totally the reason that I know anything about grinding your own wheat! I even e-mailed my husband that letter you wrote. And then he got me the grinder! And then I made his favorite cinnamon rolls!! How awesome is that?! You rock!
Yes, many do add gluten to their recipe but I’ve never needed to. I let my flour sit in the bowl mixed with water for a half hour or so which helps release the gluten naturally. You can try that (as explained in this recipe) and if that doesn’t work, maybe your friend can tell you how much gluten she adds?? CONGRATS on receiving a grain mill!!!! Very exciting!
Ah-ha! I used soft white rather than hard white! That must be the problem! Thanks again- i’ll keep working at it until I get it right!
Kristina,
I’ve been baking bread for over 5 years now, and this is the best bread I’ve ever made. I’ve added gluten to recipes and have not gotten the consistency I did with this bread. I did let my flour sit in the bowl (hard red spring, fresh ground) for over an hour, as my 3 yo and 4 month old kept me distracted. My husband declared that it was just as good if not better than store bought bread.
I use a Bosch mixer for my kneading.
Twila,
Soft wheats give you more of a store bought flour (reg flour with all the nutrients still in). Hard wheats have higher gluten content which is better for bread making. If you want to make a cake, use soft wheat…. bread use hard wheat. Red wheat is a richer heartier wheat flavor… Montana gold is a much lighter flavor. Hope this helps.
Laura, thanks so much for the videos! I have been making bread for awhile and I make really nice bricks which my poor family then eats. I have made beautiful bread once but apparently it was a fluke.
Even with your fabulous videos my bread didn’t turn out well. Everything looked great when I put it into the oven but after a few minutes, the top caved in. It took longer to rise than you recommended so I just left it until it doubled in size before baking it. Any hints as to what I might have done wrong?
Aw, bummer. :( I can’t be sure, but I think what may have happened is that the bread rose a bit TOO long after you shaped the loaves and before it went into the oven. When I have forgotten my bread and let it rise too long, it’s like it forms a big air bubble inside and it POPS once it’s in the oven, causing it to cave in.
SO, it sounds like you did everything right, but it just rose a little bit too long. Try again…you’re so close!!!
Thank you so much for responding to me. That makes sense. I think I’ll try my smaller (8.5″ X 4.5″) pans. Then I’ll see it crest above the pans and won’t wait too long. With the larger pans (9.5″ X 5.5″) it was still flat and below the rim so I waited for it to get higher. I do want to say that it smelled heavenly while baking, my husband even said so, and it tastes very good. So I’ll be trying it again soon.
Thanks again.
I did that before and it was a salt issue. Make sure you are adding enough salt..
Can I freeze the finished loaf? Also I am slow so is the above recipe good for two loafs or one? Thank you!
Yes, I freeze mine in ziplock freezer bags. This recipe makes two loaves.
So I am currently attempting this bread right now. I just put it in for its first rising, but I am not hopefully. My dough was WAY too dry so I add a bit of water and then kneeded it and it was rock hard. Almost impossible to kneed. Is it possible that this recipe has to have fresh ground wheat???
I think maybe that since you’re using store bought flour, you might just need to use less than the recipe calls for. I should have specified that in the directions!
Awesome! I am eating a slice fresh out of the oven as I type and it was so worth the wait! I had a little trouble in the begining,the dough got pretty stiff before I got all 6 cups of flour in and it took FOREVER to rise the first time, but once I put it on top of our wood stove it doubled very quickly. Excellent recipe. I don’t think I will be going back to store bought!
I love this blog by the way. Youre an amazing woman Laura thank you so much for sharing all your knowledge!
I am currently on my third try at the bread recipe in the last 24 hours…it just is not looking or feeling correct. From the video it looks like your dough is very “doughy” and easy to work with – much like pizza dough. Mine on the other hand is rock hard. It lumps and crumbles and doesn’t want to rise. When I punch it out, it is like hitting a ball of solid play dough – not bread dough. I have the 3rd round in a warm oven trying to get it to rise in the pans before baking. Any suggestions? I am getting a little silly trying to figure this out! smiles!
Could my flour be too course? It is store bought 100% Whole wheat (stone ground) it just won’t plump and the baked loaves are like super dense – not like a homemade loaf of sliced bread. more like a baguette. Thanks!
How are you measuring your flour? If you are scooping it with the same
cup you are measuring with or lightly scooping with a spoon to fill the
measuring cup? There is a big difference in the amount of flour you get..
You want to lightly scoop with a spoon and fill the measuring cup so that
its not packed down.
Hope this helps, when I am feeling like being lazy and scoop measuring
I get dense loafs due to too much flour.
Kandice,
I have found if you add too much flour you will get a very heavy loaf. Just
because it calls for 6 cups doesn’t mean you need that much. You might only
need 5 1/2 cups or a bit more. I will add up to five and then a little bit
until it gets the right consistency. Keep trying!
So the first time I made this I made one giant loaf and it was very dense! lol
Today I made it with a few changes since I was using store bought flour
I added an extra 1/4 tsp yeast and another 1/4 cup water and subtracted about 1/3 cup flour.
Its turned out PERFECT!
Hi, I was just wondering if this can be made with sprouted white wheat. I have sprouted wheat berries in my freezer that need to be ground (in my vitamix dry container). Are there any modifications when using sprouted flour? Thank so much! Blessings!
It should be fine, although I’ve never used sprouted grains to know for sure.
what do you, Laura, like to use this bread for? We use it for sandwiches, toast, for dinner, and it makes great bread crumbs.
Also where/how do you store your bread?
That is exactly what we use this bread for! I store it in freezer bags in the fridge.
Help! I am attempting to make bread for THE VERY FIRST TIME since we are snowed in and almost out of bread! But I just remembered I am OUT of honey! (Used the last of it to make applesauce bread the other day!) Will it taste okay without honey? Should I add something else?? (succanat or something?)
Just use sucanat instead, like you said. You need some sort of sugar otherwise the yeast won’t activate and you bread won’t rise. Sucanat should be fine, same amount as the honey called for in the recipe.
Thank you!!! I managed to squeeze a LITTLE bit of honey out but
will use sucanat also! Thanks again!!
I saw where you mentioned your homemade flour was a bit more powdery so I had to make a few changes to your recipe to accommodate store bought flour.
Here is the link for those who aren’t awesome enough to make their flour.
Hope you don’t mind.
http://real-women-cook.blogspot.com/2011/02/honey-whole-wheat-bread-step-by-step.html
I’m wondering how long does this keep in the fridge or on the counter? I have little guys so we probably wouldn’t consume a whole loaf in a day. Is it still good a day or 2 later? And best kept in fridge or on counter? I am normally one to shy away from bread/dough making (my husband actually loves to do that kind of stuff, but he’s been swamped with work lately), but your website is inspiring me that I CAN do this kind of stuff! (Hubby and I actually are working on finding the rennet to make our own mozzarella together!) That said, just curious about the ‘shelf life’ of this bread. Not expecting the shelf life of the store bought, chemical bread. :-) Just curious if it’s worth my time/effort to try this if it doesn’t get chowed in a day… Thanks for your time!!
I store ours in aluminum foil, due to lack of other things, on the counter for up to a week.
I store mine in a ziplock freezer bag in the fridge.
I should also mention that it keeps for about a week or week and a half in the fridge.
Laura, as far as the freezing goes. Do I let them rise for the first time, then put them in the freezer before the second rise, or just put them in the freezer right off the bat? I tried this bread and it turned out perfectly! Thanks!
If you want to freeze the dough and bake it later, let it rise, then shape it into loaves, then freeze right away before it can rise again.
I’m so excited to try this, I was about to start grinding some wheat and getting out my pans. Luckily I came to my senses and realized I have to leave my house in an hour, so first thing tomorrow!
Looks like a great recipe, and the videos are super helpful. Making bread is the one baking skill I haven’t really tackled. I’ve been looking at recipes on other blogs, but every one of them involves a bread machine which I don’t have. Thanks for showing me how to do it the old fashioned way : )
By the way, I just wanted you to know that I’ve printed off far more recipes from your blog than from any other that I read. They’re all simple and tasty and perfect for our family. Thanks again!
When I mixed the 3c. flour with 1 1/2c water it was not enough water to even make all the flour moist, much less runny like your pic looks. I am certain my measurements were acurate,I will definately have to add more water if I still need to add 3c. more flour. Has anyone else had this problem?
This website does this same recipe but with store bought flour. It worked great for me.
http://real-women-cook.blogspot.com/2011/02/honey-whole-wheat-bread-step-by-step.html
I also had to add more water. 1.5 cups sure not enough, I just figured to add more and add more flour if I have to at the next mix…yup not enough water. I would like to hear from someone who has tried this. Maybe it is not supposed to be soupy? Just Damp?
The picture there is actually of the yeast/honey/water mixture. The one above that one is of my littlest guy stirring the flour and water together, which is supposed to be damp, not runny. Sorry for the confusion! I’d say try 1 3/4 cup to 2 cups of water if your flour still is not damp enough after 1 1/2 cups.
I did add a little more, maybe hit two cups….teense more maybe
I just made this recipe in my bread machine and it turned out beautifully! I followed Laura’s recipe amounts exactly. I added the warm water and honey first followed by the salt, flour and finally the yeast. I did add a little more water during the mixing cycle. I ran it on the dough cycle, then removed it, made two loaves, put them into buttered pans and let rise for 30 minutes. Then followed the rest of Laura’s recipe for baking at 350 for 45-50 minutes. Hope this helps anyone out there who uses a bread machine. Thanks Laura for sharing this recipe! We raise bees so I’m always looking for ways to use our honey and this is a great and healthy recipe!
Hi,
I am new to bread making and am just curious if there is a more inexpensive place to purchase whole wheat flour in bulk, other than just buying it off the grocery store shelves?
Thanks a bunch.
I contacted a local Mormon church (because they have storehouses) and I can buy 25 pounds of hard white wheat for grinding for less than 8 dollars! I am still in awe. Not sure if they sell the already ground wheat. Mine doesn’t. The wheat kernels are not organic but non GMO.
I know you were asking about flour and not kernels, but just thought I would throw that out there! :). Hope you find some!
Depends on where you live…northeast Ohio and Pennsylvania areas (some others) have Frankferd Farms and other co-ops. You can try that! My Mom buys 25 pounds of flour at a time.
I made this a few weeks ago with store bought organic hard white wheat flour and it was so dense. I got my grain mill last week and tried this recipe again today. Oh my goodness! The difference was dramatic! I felt so successful to bake a great loaf of bread from scratch. Thank you for all your advice and great recipes.
I think your hair looks cute in the video :) Thank you so much for taking the time to explain to us how to spank the dough :) A good way to get out our frustrations!
I would really like to “soak” this recipe and I have 7 cups of flour left from my wheat grinding adventure, I am so excited! But I didn’t see any information on how to soak these grains. Can someone enlighten me please? :) I’d like to soak it today to make tomorrow, if possible.
I’ve not tried soaking this recipe. I would imagine it MIGHT work to add some buttermilk to the water and soak the grains overnight, adding the remaining ingredients the next day but I can’t say for sure!
I would be interested in knowing if you do try soaking this recipe and how it turns out.
Thanks, this was great! My bread turned out too dense, didn’t rise enough. I am blaming me on that. I learned alot! Ground my own wheat AND for those with an apocolyptic (sp?) attitude about home storage I wanted to see if that 45 year old wheat from my parents home was edible. Yes it was. But then anything with butter is super! Made the house smell great too! thanks again!
YES! I finally had success making bread!! Got my wheat delivered Tuesday night, ground my own flour yesterday and made 2 loaves of YUMMY bread with this recipe! SUCCESS!!!!
Grinding my own wheat just isnt working out the dough is so hard and no soft like it should be or like it is when i use store bought flour any ideas this has been a disaster
Aw, sorry for the frustration! What mill are you using? Here are all my posts on grains and grain mills if that helps at all.
https://www.heavenlyhomemakers.com/category/grains-and-grain-mills
Hi Laura! Just wanted to say thanks so much for this great tutorial. My husband asked me to start making our own bread this past fall so we could save a little money. I have had some success, but nothing as good as the bread we used to buy. Well, last week I made 6 loaves of your bread it was so amazingly good and healthier then the white bread I had been making. My husband & our weekend guests raved. Thanks so much for sharing!!!
Laura,
I have a couple questions about the flour once it has been ground: 1.) How long can it sit in a container/bag before it either needs to be used or put into the freezer? 2.) When you freeze the flour, what do you store it in?
I’m totally new to this “grinding flour: thing. I’m writing from western North Carolina and the nearest grain mill that I’ve heard of is 3 hours away! Thankfully, my sweet parents went to visit my brother, who just happens to be in Seminary those three hours away, and purchased 10 lbs. of hard white wheat flour that they had ground there in the store! However, I’m worried now bc the flour was ground on Friday and mom just brought it home to me today (Tuesday). Is it “bad” now? And, am I saying it correctly, “ground”? I’m sure you’re giggling at me right now. Just wish you could hear my southern drawl! Thanks so much!
The freshly ground flour either needs to be used right away, or put directly into the freezer. I put mine into an old ice cream bucket – works great in the freezer! Once it’s ground, even if it’s frozen, it begins to lose some of it’s nutritional value, so is best used right away if possible.
You can still use the flour you got though…the flour that can be purchased at the store is quite old and still usable.
Thanks Laura for your help! I “braved up” and for the first time in my life, I made a bread recipe that required me to Knead the dough. Wow. I made your recipe for soft pretzels and they turned out great! Now, I gonna give this bread recipe a try! What a blessing you and your website have been for me and my family! God bless!
I just pulled my first ever loaf of bread out of the oven, and I just wanted to let you know how happy I am! It seems silly to feel so accomplished for having made such a simple thing, but I’m happy so who cares :P.
I made a few little adjustments to the recipe; instead of honey I used agave nectar, and instead of butter I used applesauce (I wanted it to be vegan), and despite being a little dense, it’s delicious!
This is the best bread I have ever had! Usually, it takes my family of 4 adults almost 2 weeks to go through a loaf of store bought bread. I started making your recipe, and have to make at least 2 loaves to last the week!
And thank you so much for making a video on kneading. My first two loaves turned out well, but I felt like I didn’t do it quite right…watched the video, and the bread since has been even better-much nicer loaves!
I am so excited to try this today. Thanks to the poster who tried it in her breadmaker. We’ll be trying it with white whole wheat today, as that is what I have in the freezer. My husband is joking that he will hang out by the stove waiting for this to come out.
I love your post on bread! I am contemplating the idea of trying out bread making (as I’ve made my own pizza dough in the past – but with regular white flour). We don’t do much dairy over here for allergy reasons, so can the butter just be substituted out for olive oil? I assume so, but it never hurts to ask! :)
Yes, olive oil would work just fine!
So I made the bread, it tastes awesome!!!, but I do have questions. :)
My bread was SO short! Maybe only 2 inches high. It seemed like it had a nice texture, so I didn’t think it was an issue of rising, but maybe? How tall are your loaves when they are done baking? I’d love to have actual sandwich size loaves if possible. This maybe be a dumb question, but if I simply had more dough in each pan, would that make them higher, or would that cause baking issues?
My yeast didn’t actually bubble in the warm water and honey. Against what I thought was my better judgment, I went ahead with the bread, and much to mys surprise the dough did rise, each time. But I’m wondering if it didn’t rise enough or that was maybe the cause of my ver short loaves.
So any way to get a taller, more square loaf of bread? And any idea why the yeast didin’t bubble, but it did rise?
Thanks!
I hadn’t gotten a reply to my comment, so if you don’t mind, I’m going to post my question again in the hopes that you’ll have an answer for me! :)
“So I made the bread, it tastes awesome!!!, but I do have questions. :)
My bread was SO short! Maybe only 2 inches high. It seemed like it had a nice texture, so I didn’t think it was an issue of rising, but maybe? How tall are your loaves when they are done baking? I’d love to have actual sandwich size loaves if possible. This maybe be a dumb question, but if I simply had more dough in each pan, would that make them higher, or would that cause baking issues?
My yeast didn’t actually bubble in the warm water and honey. Against what I thought was my better judgment, I went ahead with the bread, and much to mys surprise the dough did rise, each time. But I’m wondering if it didn’t rise enough or that was maybe the cause of my ver short loaves.
So any way to get a taller, more square loaf of bread? And any idea why the yeast didin’t bubble, but it did rise?
Thanks!”
Sorry, I just get a ton of emails and comments with questions so I have a terrible time keeping up and answering within a good time frame!
Since the honey and yeast and water mixture didn’t bubble, it leads me to think that your yeast wasn’t activated well. Although, if the dough rose…
Did it rise again in the pans after you shaped the loaves? It actually could be that it rose TOO much, then “popped” and sunk down to make a shorter loaf?
How many loaves did you make – this recipe should make two loaves. Maybe you just didn’t have enough dough in your pans?
Sorry for all the guesses – it’s always hard to know without seeing it myself!
That’s okay, I understand! You finally replied and then I got busy and didn’t reply to you. So the dough rose twice, both in the bowl and in the pans. I might have let the dough rise a little longer in the bowl, but I was conscious of not letting it over rise in the pan because of troubles another commenter had. So I don’t think over rising would have been a problem since I let it rise for a little less time than you recommended in the pan – although who knows. But it did rise in the pan, to probably not quite double in size.
So I guess what I’m wondering is if you think it is more likely that I, for some reason, had less quantity of dough than you normally do, and it is just an issue of I need a little bit more in the pan (btw, I did bake two loaves), or if you think it is a yeast/rising issues since my yeast/honey mixture didn’t bubble (even though the dough did rise twice). I for sure need to bake bread again, but I’ve been hesitant since I didn’t know what went wrong last time.
Any and all thoughts/comments/suggestions are appreciated! Thanks!
And again, the bread was delicious, even if it was a short, stumpy loaf.
Eeek! I wish I had you on speed dial right now! I am in the middle of baking bread again, and I did a test batch of the yeast, to make sure it was working. (warm water, yeast, 1 tsp of sugar) That bubbled up just BEAUTIFULLY! So I thought this is it! Then I go to make my actual yeast mixture with the water, yeast and honey and that has not done a darn thing. I keep peeking over at it to see if it’s gotten foamy, and it hasn’t. Now I’m wondering if I should use my dud yeast/honey mixture, or if I could use my yeast/sugar mixture and then just add some honey into the bread while mixing. Any idea??
Thanks!
Weird, I have no idea what may have happened to it. :( Any chance the water was hot and killed the yeast?
Can you bake it not in a pan but on a baking stone?
Sure, that should work!
My husband made this today and it is SO good! We just got a grain mill and used it for the first time (with hard white wheat). We will be making this over and over again. I’m going to try your pizza dough next! Thanks so much! :)
Hi Laura,
I tried your cinnamon roll recipe for a potluck and it turned out very well!! I was my first time making cinnamon rolls. So I am really happy that I found your website!
I also started to make my own bread recently. I saw the whole wheat bread recipe and it looks very nice! Just have one question about the recipe. Is it possible to add some seeds or oat in the recipe? If yes, do I need to reduce the amount of flour or I should add some more liquid ingredients?
Hope to get your reply and thanks a lot again for the recipes and the little stories about your family. I really enjoy reading it! :)
Yay for you and the cinnamon rolls!! :)
Yes, you can add seeds or oats – I wouldn’t think you’ll need to cut down the flour much. But, what you could do so that you know how much you’ll need: add just part of the flour, then add the oats and/or seeds that you want…then add the remaining amount of flour or however much you need to complete the dough. Does that make sense??
This is absolutely delicious! Thank you so much for sharing! I will try adding herbs, garlic, and other arromatics to enhance your whole wheat glory!
Laura,
I made this today and it turned out fantabulous!!! Thank you so much for this recipe. But…my kids said it was a little too sweet for their tastes. So, if I omit or reduce the honey, would that change anything? Would I need to add more butter or water?
Don’t omit the honey, or the yeast won’t be activated. But you can certainly cut the amount in half and be just fine!
kinda dumb question but how to you store your bread? or any other baked things you have (cookies, pop-tarts, etc.) Thanks!
Once it’s completely cooled, I put it into a ziplock bag and store it in the fridge.
I make a bread VERY similar to this in my bread machine. My recipe (like all commercial recipes) calls for half whole wheat flour and half white flour. This should work fine for anyone with a machine.
Laura, is there a health reason I should not use a bread machine, or do you just prefer to do it by hand?
I don’t know of anything unhealthy about using a bread machine, I just prefer making it by hand!
When you make this in your bread machine, how big of a loaf does it make? I just got a bread machine and don’t know much about using it yet, I don’t want to mess it up by putting it on the wrong setting. \
This looks great! i’ve been wanting to bake bread for my family to use for sandwiches everyday. Do you think this would slice thin enough for sandwiches? can i store the extra baked loaves in the freezer?
Thanks!
Yes, we use this bread for sandwiches – it’s a little more crumbly than store bought but it does work! Yes, you can put your extra loaves in the freezer in ziplock freezer bags and they will keep fine.
I happened to have found a trick from another site, to leave your loaves in the pans until completely cool, this makes the bread softer. I have been making your bread for a few months and the last two times I tried this and it really works. that way it makes for a “softer” sandwich bread, as I am trying to not buy bread and use this recipe. Also love your cinnamon bread we ate an entire loaf last night with dinner;}
Thanks for this site and tutorial! I have been using your cheese cracker recipe and everyone LOVES them, but I continue to fail at getting my bread to rise. I’m going to try your recipe and method right now because I’m beyond determined to do this right. Oh, and I think it’s hilarious that you “spank” the bread after kneading and shaping. I’ll have to remember that step; maybe it will be the special key to make things work. ;D
I was frustrates with bread not rising since moving to where we have city water. (I grew up with well water)Somewhere online I read that stuff they put in city water can kill your yeast and it won’t rise… different area’s are different. And also really hard water can kill it. So I tried buying spring water and sure enough… for the first time my bread actually raised really well! might work for you too?
The water thing is most definitely true. We actually have a Culligan water system and I used that. After 10 minutes…no bubbles. I read Anna’s advice and used well water and it bubbled very nnicely!
I finally took the plunge and make a batch the other day. So yummy but I did learn to start earlier and not stop in the melting butter part to get dinner in the oven lol. Not bad for my first batch of bread ever.
This totally did not work for me :-( I ended up with a sticky, unmanageable mess. Perhaps I did something wrong…when do I add the remainder of the water?
Second part of the water is added to the yeast and honey mixture. Don’t get frustrated, it can be really frustrating making bread. If you ended up with the sticky mess, you probably didn’t use enough flour. The dough will stick to you a little bit but will be easy to remove. Don’t give up-and if you have someone to help(an aunt, neighbor, friend)ask for help, it makes it so much easier and gives you a better idea what to expect. Good luck with the next batch.
I read in an Amish cookbook that if you spread butter over the top of the bread when it first comes out of the oven and then let cool half way in the pan, then put in a plastic bag, it keeps the bread nice and moist. I have tried this and is seem to work really well and helps the the crust to soften too. Love this bread recipe.
I made a bread very similar to this for the daily bread at a vegetarian restaurant that I owned for years. I have a great addition for you to try. I kneaded in liberal equal amounts of sesame, poppy and raw sunflower seeds, then rolled the shaped loaves in an extra amount of the 3 seeds. The bread became very popular and was called “Chico’s 3 Seed Bread”. Makes great toast. Thanks for your recipe! I will try the butter idea…..I always used olive oil.
Can you give more details about freezing your unbaked loaves? I’ve read some things about the need to increase yeast because some dies during freezing. I’m also wondering if you freeze it in a bread pan before you wrap it and how you package it to keep it fresh and without freezer burn.
I’ve not heard that info on adding more yeast. I usually mix the dough, knead it, then let it rise once. Next, I shape it and freeze the loaves before they rise a second time. I freeze them on cookie sheets. Once frozen, I transfer the frozen loaf into a freezer bag. When I want to bake it, I place it in a buttered bread pan overnight (on the countertop), then bake in the morning.
I recently read the same thing about increasing the yeast. Do you still mix dough knead it then let it rise once before freezing
Is the first step of adding water to 3 cups and then letting it sit for a while in place of soaking the grains? If I were to soak the grains overnight would I still add the water and let it sit? And also is it beneficial to soak the grains for only a couple hours. Like if I were to grind my flour first thing in the morning and then soak them until 1 or 2 in the afternoon? Thanks
No, this isn’t a soaked grain recipe. The only reason you add the water and let it soak in the flour is to help release the gluten before adding the remaining ingredients.
I still haven’t found a soaked grain wheat bread recipe we love – if/when I ever do – I’ll be sure to share it!
Great Recipe! The pictures/videos really helped. The yeast mixture did not bubble very much, and the dough was tougher and stiffer than in the videos. I did not have to add all 3 cups of flour when kneading. However, the end result was delicious, golden brown, fluffy and smells like heaven! tastes great with butter or honey. Thanks!
I have a question about the pictures above…..When I added to water to the flour in the beginning it was barely wet enough to combine everything….but yours looks like soup :/ If using packaged flour should we use way less than if it was fresh milled?
Thanks!
DUH!!! that is the picture of the yeast and honey…..uh oh!
:)
I am having the hardest time with this recipe today :/ I cant get my yeast to bloom….I am using sAF brand. I am also trying to kneed it in my kitchenaid and it is tough, dry, and wont stick together…Help?
Yikes, I’m not sure why the yeast won’t do anything for you unless it’s old? Sounds like your dough needs a little more water – just add little bits at a time until it forms a nice dough ball.
I have no idea! I went and got different yeast…and flour. Is it possible that there is too much honey for the yeast to get all bubbly? Your dough in the video is just so smooshy and elastic…..mine not so much. And the outer skin breaks….Maybe it needs more water in the beginning? I am new to making bread, so I’m not sure how exact these things have to be :/ Thanks for your help!
On another note I was reading about your $4 gallon of raw milk. We pay $7 for half a gallon. I have raw milk envy! My s.i.l. is always telling me that groceries in the mid west are way cheeper. Looks like she is right! We are in CA. I guess there is a price to wearing flip flops all year and being 30 mins from the beach :)
I feel like I have reached my comment limit on this post! :) Well, after 3 batches of dough being what I thought was dry and tough, and then my dough barely rising 2 times, I decided to just throw it in the oven so I could atleast make bread crumbs with it. WRONG! It was actually pretty darn good!!! I think in all my frustration I forgot to add the salt :/ Still delicious though. I am going to make it again today and try adding more water to see if I can get it to be more elastic and smooshy….and hopefully a better rise. Thanks!!
Glad it tasted great, even if there was frustration in the process!
SAF yeast (I believe) is instant yeast not active yeast.
Does not need to be bloomed
I have had trouble with yeast recently after I got married and now live where there is city water instead of well water. I did some research after many very bad attemps, new yeast, new flour etc. I found that city water can have things added to it to that kill the yeast. Also hard city water can make yeast not work too… and we happen to have hard city water! so bad i guess even our water filter didnt get enough of the stuff responsible for killing my yeast out so I tried spring water from the store… AND IT RAISED great! ahhh… I was starting to feel like something was wrong with me and my husband was becoming convinced I didnt really know how to make bread or cinnomon rolls like I had been claiming! sooo… maybe that will help you?
Hi do I need to use honey? Can I use sugar or something else?
Sugar would work also. :)
Wow, letting half the flour sit in warm water helps bring out the gluten, thanks for the great tip! I have been adding vital wheat gluten but I’ll try this next time.
Hi, just to follow up on my previous comment.
I made my bread this time without vital wheat gluten.
I soaked the flour in warm water as you describe.
It worked and my bread turn out beautifully!
THANK YOU! I WON’T HAVE TO BAKE WITH VITAL WHEAT GLUTEN ANYMORE!
My Mother-in-law always uses a teaspoon of lemon juice or vitamin C powder (or a crushed vitamin C chewable) to help activate the gluten in her bread. We bought one big order of wheat that sure needed it (it did help a lot), but generally it’s a step I skip. You can try that if the soaking is ever not quite enough.
This was my third attempt (and third recipe used) to make whole wheat bread, and it was my only edible batch! Very tasty! I don’t think it rose as much as it was supposed to, but I will definitely try it again. Thanks so much for the recipe.
How many loaves of bread does this recipe yeild. Looks like about 2, but I see you have 4 pans. Thanks.
You’re right – it does yeild two loaves. I had doubled it when taking pictures, just to make things confusing. ;)
Maybe you could explain the kneading the dough step? For some reason the videos are not working and I am at a loss since I’ve never made bread before. I googled ‘kneading dough’ but I’m definitely confused as to how much kneading is enough.
I guess you could describe the process of kneading as “folding and squishing, folding and squishing” the dough over and over for several minutes. I wonder why the video isn’t working?!
Will I need to alter the recipe any if I use rapid dry yeast
I don’t think so, but can’t say for sure.
When I combined the water, yeast and honey it never did get bubbly. I tried this twice with the same results. I know my yeast is good because I went on to use another recipe for bread and it turned out fine. Do you have any idea why I might be having a problem with this? I would really like to try your recipe.
Maybe your water was too warm? I’ve killed yeast too many times because I was impatient and used water that was too warm. If you checked that and it still didn’t work, keep experimenting and let us know what you find out!
I like that Missy said her water has been too hot, because I have had the
opposite troubles before! :) yeast can be finicky. When I make this bread
I have to run my water at the hottest it will go and use it so the yeast
is activated. Experimentation is probably best. If you think it is too cool
try making the water hotter, and visa versa. :)
I used instant yeast when I baked, since that was the only thing in my grocery store. From what I gather, you should use a little over half the amount of normal yeast.
I used room temperature water, but accidentally added some freezing cold maple syrup without thinking and was sure it would have killed it, but lo and behold it started bubbling less than 10 minutes later.
If you are buying yeast in bulk (like at Sam’s Club) then you don’t need to add it to a liquid and let it “bloom.” Most modern yeasts should be added with the flour (strange I know!). Check the side of the package-it should give you more information. I have been baking bread for years (with bulk yeast), and I don’t ever wait for the yeast to activate. Just mix and go. Best wishes.
I made ythis recipe today and I can’t believe how wonderfully the bread turned out! Not that it wouldn’t, your recipes are great! I was just surprised that I was able to make bread BY HAND and it come out as well as it did. I hesitated all day about making your bread, or making a whole wheat recipe for bread machines. I LOVE my bread machine. I usually let the machine do the mixing and kneading, then I take it out, put it in pans and let it do the final rise before baking. I’m so GLAD I used your recipe. The crumb is moist and dense and the flavor is amazing! We couldn’t wait to taste it – slathered butter all over the pieces we cut and gobbled them down! Thank you for this wonderful recipe – my family thanks you too! Many blessings!
I made bread for the first time using your recipe and it turned out beautifully, thanks so much!
I did make one adjustment–replaced honey with maple syrup, since that’s what I had in the house.
Best bread I’ve ever had! I always find the store-bought brown bread, even from bakeries, tends to be too dry. The homemade bread was just delicious and I don’t have to guess as to what I’m actually eating!
I live in South Texas but have been following your blog and many recipes. Have found them very helpful, and a friend and I have begun ordering from Azure Standard. We use the same type of wheat as you (yes, we’re copying a lot of your stuff!). I have found that there are lots of hulls and even a little trash/stones in the wheat. I have spent much time picking through it but my friend just grinds it all up. Do you think it’s worth picking through? Do you pick through yours? (sometimes if the kids are in trouble it makes a perfect disciplinary chore!) I was worried about hurting my new wheat grinder (yes, also the same as yours!) What do you think? Thanks for your ideas.
I guess I haven’t found it to be much of a problem. I do pick out anything obvious that I see, but overall I haven’t worried about it too much. :)
Okay I’m trying to have faith cause the bread is in the oven now. But it felt like a brick! I couldn’t even add the last 3 cups! I don’t think I added but maybe 5 cups! Don’t think I messed up on liquid. Is that a correct recipe? 6 cups of flour to 1 3/4 of water??? Help??
Laura may have a better answer, but here’s my two cents: Moisture and gluten content will vary depending on your flour and whether you used honey or sugar, so the flour amount is, as I understand it, 3 cups initially, then more to make a dough you can start to work with, then maybe up to 6 cups TOTAL by the end. Don’t give up! ;)
Wendy is right! It all depends on the kind of flour you use and the other
ingredients (wet vs. dry). It should be just fine! Bread is fun to
experiment with because you figure out exactly what works for you and
before you know it you’ll be baking perfect bread!
Thank you for sharing your recipe and your methods! After making bread for a large family twice every week since I was six years old, it just continued into my routine as a newlywed… fast forward 12 years, and only last month did I realize that the amount of homemade bread we consume in a week could EASILY cost $80!! And that’s for mid-quality $2 store-bought bread! It would cost over $100 a week if we ate as much bread as we do, and bought it at $3 or $4 (or $5!!)a loaf! There’s NO WAY we pay half that, even if I make it with higher-cost sweeteners (like honey or maple syrup) and oil (like olive), AND we’re missing out on all those unpronounceable ingredients. (I do have my own wheat grinder, and we make a huge annual purchase of bulk wheat from Walton Wheat (honeyvillegrain.com charges more, but ships any order to anywhere in the US for $5). I’m sure that saves a bundle over buying wheat flour)
We love to add flax seeds to our bread: a tablespoon for each loaf or two. Adds fiber, a nice nutty taste, some good fats, and you CAN leave out your other oil/butter, except for oiling pans, maybe. I always kneaded my bread in oil, not flour. Kneading in flour looks fun, and would be easier to clean up when the toddlers have helped. :)
Thanks again for sharing!
So exited to find a recipe that does not require a kitchen tool that I do not have. I’ve got more time than money, so this recipe is perfect! Can’t wait to try it!!
I thought it was funny, so I just thought I’d let you know that my 2 1/2 yr old daughter is really bothered by not being able to see your head in your “how to” videos! She stood next to me while I watched both of them and repeated over and over, “I can’t see her head. I want to see her head. Where is her head?! I need to see her head.” and so forth. :)
I’ve been testing out a few different bread recipes over that last month or so. This one got a big thumbs up from my boys. I love it because it’s easy and yummy. Low maintenance… just my style.
Hi there!
How do you like stoneware vs. glass to bake bread?
Thanks :)
I much prefer stoneware as I like the end result of the bread, plus it’s easier to get the loaf out of the pan. :)
curious if you use hard red or hard white whole wheat?
Laura uses hard white whole wheat. Thanks for asking! :)
So I’ve read about a hundred comments and I don’t find anyone mentioning how small (short) their loaves are compared to store bought loaves. But when I look at your pictures, your loaves are quite short (at least it appears that way since they didn’t even raise up to the level of the pan).
I made 2 loaves tonight. Smells delicious, tastes delicious, sliced perfectly……but short smallish loaves. Just double checking that this is normal. Yes, everything rose twice, looked just like your pictures. I’m just wondering if I put the whole batch of dough in one pan if it would have turned out to be more like store bought size/height. Thoughts?
That would probably work out fine!
A thought for anything you might deem as a failure… dough hard or not rising… roll it out cut into squares sprinkle with salt and bake.
Make sure to add more water if necessary.
In essence, Don’t Let It Drive You Crazy, Make Crackers!
God Bless You and Have A GREAT Day!
What a great idea. Thank you because so far I have had 4 flops in a row while waiting on the one to succeed.
Please help…I have tried this recipe 3 times and I think I am doing something wrong with the yeast. My dough never rises. I am following the directions and don’t know what else to do. I am not a experienced bread maker so using and activating yeast is all new to me. Can anyone help? Thank you!!
http://www.breadworld.com/VideoList.aspx
Fleishmann,s Yeast Video Page for using yeast.
Thank you! I saw the video and checked the temp of water before adding the yeast and it still didnt rise. Could it be the honey instead of sugar because she says to add a tablespoon of sugar.
I am gonna get this if it kills me.
I do know that yeast is alive I do believe it a fungus…
Honey has antibacterial properties, not antifungal…
I guess I would try the sugar first, then maybe a different honey.
Honey has been found in the pyamids-STILL GOOD! So the age of the
honey shouldn’t be a factor.
You can always call and ask about honey in bread recipes ;p
Fleischmann’s 800-988-7808
I did some hunting on their site and found a free recipe book
for 1.00 S&H
Also try http://www.kingarthurflour.com/
I haven’t actually made bread in a while I think I will this
weekend. One of my favorite recipes is to take any bread recipe
1 loaf you like/love, roll it out about 1/4 inch thick, sprinkle
with cinnamon, sugar, chocolate chips/nuts or
jam/jelly. Roll jelly roll style(hmm)slice into 12 pieces
place in a 13X9 pan and bake, let rise 20 minutes or until doubled
in size. Bake at 400 15-20 minutes. Frost if you please!
I pray you efforts are rewarded soon, God Bless you!
Thank you all for the help. I did go ahead an try sugar and that worked. I also tried the honey again and it didn’t. After today I decided I am going to go ahead and call Fleischmann’s. I will post what their response is. I can’t be the only one who is or has had this issue. I just want some bread for my family and I, I didn’t know it was going to be this challenging. On the up swing I have made many other recipes from this site and we love them ALL. Thank you Laura!!
Miki, I feel your pain. (: It can be very frustrating when bread doesn’t behave. (: Just a thought here..do you think your water/honey mixture is staying warm enough to wake up the yeast? I usually use *hot* water when making bread b/c by the time cool honey is added, the mixture becomes properly “warm.” (Hot water + cool honey = warm lovely environment for yeast!) Sorry if this is something you’ve already thought about. Have fun..you’ll get it. I like the cracker idea someone posted above here. All the best!!
OH MY!!, I never thought of the honey “cooling” the water. Do you think if I warmed the honey and checked the temp it would work? I am gonna try it. Thank you so very much for the insite.
I am a beginning bread maker but am an avid baker so I do have some experience.
My bread is always a bit dense (not necessarily this recipe but all breads I make). This is my first time trying your recipe and I just finished the first kneading. I watched your video. I’ve always kneaded the way you demonstrated but my dough doesn’t seem as soft as yours – it holds the fold that I make really well, even when I give it a good push. Do you have any tips?
Also, what do you do if the yeast doesn’t bubble? I have a problem with this. My yeast is a few months old (I bought the jar) but I do store it in the fridge as the jar instructs me to and it has only been a few months (the jar says to use it within 6). Do you have any tips hear?
Thank you in advance for the help! I’m really looking forward to tasting this recipe.
When I did the second need and shaping, the dough was still very stiff and not soft like yours appears to be. I think the bread came out good but it could be less dense and I think the stiffness of the dough as I knead may be related to that. Please let me know your thoughts. Thank you!
Try adding just a little less flour next time to see if that helps. :)
If your yeast isn’t bubbling, it can mean that it is old and dead, or it could be that it isn’t activating properly because the liquid temperature is too hot and kills it. Those are just some ideas on that. Regarding your dough being too dense and not kneading well, it sounds like you could try adding a little less flour to see if that helps.
I am in the final stages of this right now! In 30 minutes the loaves go in the oven. I am a disaster in the kitchen so if this works you will be considered the guru of all guru’s! I just love your humor throughout. Wish me luck!
Umm.. I think I am going to have to call you my hero? I have been looking for so long for a recipe that doesn’t have white flour and or powdered milk, shortening!!?? GROSS! You just made my day as I stumbled onto your site. This is being printed immediately and made in the morning!! Thank you!! Now I’m excited I can use my mill grinder again!
Has anyone used a kitchen aid with the kneader attachment to knead the bread instead of doing it by hand? Is there a difference in kneading time?
I used my kitchen aid this morning. This is my first shot, so I took a chance and have no idea how this might turn out. It’s not looking like the bread is rising….I hope someone experienced will post an answer because I sure would love for it to be ok to use the mixer! :) good luck!
; D
This is probably long since an issue…I go by how it feels,
the elasticity. I don’t know how else to explain it.
You have to take the dough hook out and pick it up, or at least I do.
LOL Good luck!
HOw do you slice the bread to have equal slices for sandwiches? Do you use a bread slicer?
Nothing fancy…just a regular knife. (But practice probably helps!)
:)
I found that turning my bread while I cut it works well for me.
By that I mean, the first time I cut it is top side up,
then on its side, then maybe the bottom up, then the side.
It takes the irregularity out of the slices, because your hand
tends to move the same way so the way you cut becomes more pronounced.
I do the same thing with cheese.
Also keep in mind that sometimes you cannot cut on a particular side,
because the loaf will crumble or smooch, so rotate while considering
the structure of the loaf.
Do I put much thought into these things! Hope my intense thoughts
on bread cutting helps!
Can this recipe be made with regular yeast? I sent my husband out for active dry yeast and he got economical on me and bout 2 pounds of regular yeast. I hate for that to go to waste, but most recipes call for active dry. Can you tell me the difference? Thank you!
Sure, go ahead and make it with regular yeast – you should be just fine!
Hi, my bread looks great going to the oven, then it continues to rise and the top slips to one side. Looks like a bad hair piece slipping to one side or the other.. Bread tastes great but it looks funny.. Any tips you can give me to resolve this problem?
Sounds like you may be waiting a little bit too long before putting it into the oven to bake – so it is over-rising. Try cutting down your rise time by 10 minutes and see if that helps!
Hi there, this recipe looks like what I need, but I am interested in making 8 loaves not 2… You said you have doubled it. Do you double EVERYTHING including the yeast? The sponge?
Thanks
Yes, I double everything in the recipe, including the yeast. :)
Thank you so much! I made it today and even though I fogot to add the butter (I added it later!) The dough was a fantastic texture and rose beautifully. I have never EVER had 100% whole wheat bread rise like this. I plan on doubling it again to get 8 loaves so I only have to bake bread once a week. Thanks again! Fantastic.
Oh and I did have to add more water to the flour in the first step and then again before kneeding to get the right consistancy but my flour seems to absorb more than normal. Anyway, it worked!
I made a half recipe in my bread machine today. I substituted 1 C of sourdough starter for 1/2 C water and 1/2 C flour and still added the yeast. It came out great! And the house still smells like fresh bread!!
Hi..just wondering why my loaves of bread do rise but they have like flat tops when baking time is done! So disappointed because I have no trouble mixing or kneading a perfect dough! Looking forward to a reply!…you have a good thing going here on site! :)
My guess is that it rises a little too long before going into the oven. If it rises too much, it will “deflate” in the oven, so to speak. Hope that helps!
Thank you! Yes, I did make another batch of bread yesterday (wasn’t going to give up & very determined to get it right!) & you confirmed my mistake of allowing the mixture to rise too much! So I watched it closely this time round, made the necessary change & the loaves came out beautifully! Can not wait to make some more! :) I am into the routine of making one batch wholewheat & the other wholewheat molasses raisin, just to mix it up! My family enjoys homemade cooking & baking, so now I am passing the tradition on to our two university students, our son & daughter, who both make a practice of enjoying whipping up meals & desserts when time allows it, in their busy schedules away from home!
I can see this happening with your young family as well, where they are getting exposed to the same thing now!..and it is all good in these times of so much fast food out there! :(
Thank you so much again for responding to my bread-making concern! Bread is a fairly new enjoyed hobby of mine, which I make by hand like yourself, so I also have your website bookmarked for browsing & trying out new recipes, etc.
Keep up the great work! :)
I made this today and it tastes great. It rose in the bowl and rose a little more in the pan but turned out small. Any ideas what happened and how to change it? Like I said, it tastes great, looks great, good texture, not too dense. Just small.?
Hmm, not sure you did anything wrong necessarily. My loaves are usually not very big either.
Wait a little longer on the rise – or give your bread a warmer place to rise. Our modern air circulated/conditioned homes don’t always provide bacteria friendly environments!
I tried this with my baked spaghetti bread recipe, and it turned out perfectly! I made just one loaf, so I cut all the ingredients in half… the yeast never activated because I tried to use half of it also. Once I figured out I needed to use the full yeast, everything went smoothly! It’s so much better than the frozen bread I usually use! Thanks so much for posting! :)
I’ve been on this bread kick recently, and I’ve got to say, I use the same recipe you do, BUT I put it together completely differently! When all the hoopla came out about the dough stabilizers used in many commercial breads I decided my family would not be eating store bought bread any longer and I had to find a way to make it fast enough to do in between everything else that needed doing. Anyhoo. I mix my bread like biscuits. All flour (I use a bread flour specifically) but 1 cup goes in – the one cup is reserved for when you’re kneading in the last of the moisture, sugar, yeast and salt. Liquids and fats are heated together and added to the dry ingredients by making a ‘well’ in the center and pouring the liquid into it making whats often called a “shaggy” dough – it’s hairy at first because it sticks and pulls away from the sides of the pan.
Activating the yeast in an age where we have reliable yeast unless we have done something adverse to it is an extra step that we can leave out. Extra headaches and dirty dishes.
The yeast will activate in dough. While you’re mixing your dry ingredients preheat your oven to 200 degrees. When it’s heated turn it off and leave it open till you can put your hand on a rack for about ten seconds without burning it.
Put your dough in a lightly oiled, heat safe bowl, cover with a towel and put it in the oven for about 20 minutes. Voila. Risen Dough. If you’re having a play kind of day, you could do this again, or you could knead and put it right into loaf pans (or portion and freeze – the yeast will turn back on when you thaw it in a warm room making bread an anytime thing)set your oven to 350 and put the pans right in.
The time the oven is preheating will give you your second rise, and then move right into cooking. This takes what could take hours down to roughly an hour to the oven. This is also great if you want to use Comfy in the Kitchens Calzone Recipe – although I tried it with bread dough tonight and I’m thinking a pizza dough (less oil, less liquid, crisper dough) might give a nicer texture.
Clarifying, all dry ingredients are together before adding liquid and the last cup of flour is kneaded in as needed!
yeast is a yeast, not a fungus or a bacteria. When you try to get your yeast dough to rise, if the air in your house is cool, it won’t rise. I often will make bread when I am doing other baking or cooking so the room is slightly warmer than the air conditioned cool my husband likes! Yeast needs sugar (honey, syrup, sugar) water or other liquid, and a little bit of heat to rise. Salt added to the yeast will make it not rise very well.
Biology lesson: Yeast feeds on carbohydrates. When it feeds, it gives off carbon dioxide. Kneeding the dough is not for dispersing yeast throughout the entire loaf but rather to make the gluten become stretchy. If a person doesn’t kneed the dough enough, as in about 5 to 7 minutes or the preferred 10 minutes, the gluten (flour protein) will not stretch. This might be a reason someone’s bread is not light or fluffy. It is the carbon dioxide (from the yeast feeding on the carbohydrate sugars and perhaps some of the flour) which creates the little-holes texture in the dough. When it is baked, the yeast dies, and the carbon dioxide holes are still filled with air. If you do not kneed the dough long enough, the gluten will not stretch, and the little holes will not form. You might get one large hole or none at all.
One other thing–if you make a larger loaf of bread, or use the entire recipe for just one loaf, you will need to bake the bread longer (of course) and the chance of the top browning too much increases the longer the loaf is in the oven baking.
I use the ratio for my breads of one cup of liquid for three cups of flour. I use less liquid if I use honey, and less if I use oil. I don’t add the salt until I add the flour. And, I use a bread maker for all but the rye breads I make. I like the feel of rye bread when I kneed it.
100 years ago, the women made their own yeast by simply collecting it from the air. They made a paste of flour and water and left it outside for a day or two. There is enough natural yeast around for the spores to gather; the women used this for sourdough if they didn’t have a start from someone else.
It doesn’t seem like anyone has made this successfully in their kitchen aid mixer. Is that true? I’m really hoping that I can use that as I need the simplicity of turning that on for the kneading instead of me kneading for 10 minutes. I hope to one day knead it myself, but being new to making real food and not using everything prepackaged…it’s one more step that I’m not ready/able to make yet.
Thank you so much for all your wonderful recipes and guidance!
I use my Kitchen Aid for bread making but the little bit I do hand knead the bread. Just to get the feel of the bread.
I have also used my mixer to get it started for me. Then I just make
sure it is all worked through at the end. I have had great luck. Be careful
not to over mix it though!
kneading is the best part! :D
I use my Kitchen Aid to mix and knead. My recipe makes only 2 loaves, so the bowl for my KA is just the right size! The loaves are always beautiful.
I’ve used my kitchen aid twice for this same recipe and the first time didn’t have much luck with the dough rising. It rose a bit once in the oven, but not like it should. The second time, I let the dough rise for 2 hours initially then 2 hours again in loaf form. It turned out beautifully the second time. Not sure why it needs the extra rising time though. (My white whole wheat flour is not freshly ground though…maybe that could be why.) I followed Laura’s recipe letting the flour and water rest in the kitchen aid bowl and then when it came time to combine and knead, I let the kitchen aid do the work adding flour until the dough clung to the hook and cleaned the sides of the bowl. Then let it mix on speed 2 for 2 more minutes. My dough began to stick to the bottom of the bowl a bit toward the end, but that’s okay with me. I like to leave the dough a bit moist so when I use flour to shape the loaves, it doesn’t get dried out:) Good Luck!
AND….I only baked it for about 30 minutes:)
Hey Laura, I really liked the recipe. You did not use all APF at all. This makes me even more curious to try your recipe! Thanks for sharing on PInterest. I am pinning this to my board. Hugs
What’s APF?
All Purpose Flour DUH, sorry :)
Is it OK to use salted butter?
Yes, that will be fine.
what did i do wrong if dough did not double?
I can’t say for sure, but it seems like your yeast “died” somewhere in the process, maybe if your water was too hot?
silly question. If I doubled the recipe like you do, then make only three loaves instead of four, would the loaves end up bigger or would they just end up more dense? I can never seem to make a nice tall loaf of bread when I use whole wheat…
Not a silly question at all! The loaves may end up more dense. I would
allow the dough to rise longer once in the pan. See if that helps at all. :)
I use a sourdough starter (which I have had for about 20 years) instead of yeast. Have you ever done sourdough bread? I use my KitchenAid for the kneading. Sourdough takes a little longer to raise. It’s about a 2-day process for the feeding, making, and baking of the bread but sooo worth the effort!
Hello there!
A couple questions… do you use unsalted butter? And how important is the honey… or rather, how sweet does the bread taste, given those quantities?
I typically use salted butter. They honey (or at least some sort of sugar) is pretty important to use – otherwise the yeast won’t activate and the bread won’t rise. You can, however, use less if you would like. This bread isn’t super sweet, but if you add less honey, the bread should still taste good.
Fantastic
I only have two loaf pans, so could I plop a loaf into a…cake pan or something? Would that work? Thanks!
The recipe is for 2 loaves, Laura doubled it for her family in the pics.
Just read below LOL.
Oh hahaha I just read at the top where you said the picture is doubled xD. Never mind then hehe.
Just made my first batch of DELICIOUS homemade bread thanks to your recipe! So easyto follow your directions, I’m so glad I found this!
How can I try this in my bread machine?
Unfortunately, Laura doesn’t know…and neither do I. :( Sorry to be so
unhelpful!:)
I have made lots of bread in a bread machine, you just need to cut this in half so you are making one loaf at a time, and adjust as needed for the size loaf your machine makes. What I love best about a bread machine is how well it mixes and kneads the dough. I’ve never met one yet that does a good job of baking though. My solution was to let the machine do the work of mixing/kneading ONLY, then let it raise, form loaf, raise again, and bake in the oven. Much better presults, for me. I hated using that much electricity to bake one loaf, so I’d let the first batch rise while the machine mixed up the second loaf, then let both loaves raise, ready in pans, raise again, and bake together. Good luck!r
Hello! This is an awesome recipe and the very first homemade bread recipe I’ve ever tried! I’m looking for a way to use this as frozen dough for things such as stromboli, etc. in place of storebought frozen bread dough. Any suggestions? It would need to be rolled out flat before it was filled with the pizza sauce, cheese, meat, etc. and I don’t know if I should try to freeze it flat or freeze it in a loaf shape and then roll it out flat once it thaws and rises the second time…?
I freeze it in a loaf shape as that tends to work best.
We loved the flavor, but felt the bread was a bit dense. Did I not let it raise long enough? Or do you have any other suggestions? Thanks so much!
I have found every time my bread is dense that I used too much flour. Try using a little less next time. :)
Made this bread today and loved the flavor, but it didn’t rise well at all. I think the problem was with the yeast proofing step – with the large amount of room temperature honey, the yeast didn’t get very bubbly like it normally does. Can I melt the butter, then add the honey, water and yeast to that to proof all together as long as the butter is not too hot? Or would the butter hurt the proofing process somehow?
I don’t think that the butter would hurt. Like you mentioned, just make
sure it is not too hot. :)
Can I substitute olive oil for the butter. If so, how much?
Yes, I believe that should work. Just switch it out one-for-one.
Hi Laura,
Your instructions are wonderful. Only one thing is wrong. Your recipe calles for 1 3/4 cups of water. It should be 2 3/4 cups, with 2 1/2 cups used to mix with half the flour.
It is looking great. It’s going in the oven in 20 mins. Can’t wait to slather a hot slice with butter.
Thanks
Cheers
Victor
I just made this bread and WOW! I had no idea the recipe posted was for 2 loaves and not 4. It was a bit confusing since all the pics show 4. I watched the video on shaping the loaves after it was in the pan rising and the other 3 were in the freezer (LOL). So my loaves are small but so delicious. Next time I will make the 2 and hopefully they will come out like sandwich bread. This is my second time baking bread and my first time using this recipe. I like this recipe better than the first one I tried from another source, although that one was pretty darn good too. It just wasn’t high like sandwich bread. Thank you for this recipe. I used store bought whole wheat flour and kept everything else the same. My dough didn’t look as good as yours in the video, but I guess it doesn’t matter because it was delicious. Next time I will try using white wheat and maybe it will turn out not quite so dense.
I love this recipe! I’ve never been able to make very yummy 100% whole wheat bread until now, so thank you for the fabulous recipe and tutorial! I discovered our local health food store has a wheat grinder so I’ve been grinding organic white wheat and bringing it home to the freezer until I can get my own wheat grinder. The difference from store bought is amazing! Thanks again. : ) God bless you.
What type of flour do you use? All purpose, bread, what only thing in confused about
I use freshly ground whole wheat flour from hard white wheat: https://www.heavenlyhomemakers.com/category/grains-and-grain-mills
I love hearing the “kid sounds” in the background! Great instructions and video. God bless!
It is an awful recipe with innovative technique to make a soft bread from whole grain and use of honey instead of sugar is another feather to its cap. Thanks a lot.
The technique to make a soft bread from whole grain and use of honey instead of sugar is worth appreciation. Thanks a lot.
I am excited to try your recipe, Laura! One question… I buy my yeast in bulk instead of in packets (I bake a LOT of bread). I use Fleischman’s Instant Dry Yeast from BJs. Do you think the measurements would be the same as with active dry yeast? Thanks!
Yes, you can use the same measurements. (2 1/4 teaspoons equals one packet.)
Hi Laura-
I’d really like to try this recipe but our family is dairy free. Is it possible to substitute the butter with coconut oil or olive oil?
yes! Olive oil is what Laura recommends.
I use olive oil. I also use ground flax seed. The bread turns out well either way.
I just have to say- THANK YOU. I have tried different whole wheat bread recipes and have struggled with the rise but today I made this bread and am FINALLY experiencing success with homemade wheat bread. The videos really helped me understand the process. Now…my bread is almost ready so I must go! :) Thanks again!
This may be a strange question, but it looks like you sliced your bread perfectly in that photo of it in the basket. Do you have any tips to get the slices uniform? Do you use a special tool? Thanks.
No special tools…just lots of practice!
I just want to say THANK YOU! When I decided to make the switch to whole wheat bread this week, I had a feeling I was in for a long week of trying recipes to find something that wasn’t gritty and dry. I have heard horror stories about making wheat bread. I read the reviews on your site (and others) and decided on your bread recipe. My first 2 loaves of wheat bread came out of the oven 30 minutes ago, and already half a loaf is GONE! My kids LOVE it! A few notes… 1. I only needed to use about 4.5 cups of flour. I was very worried, but as I said above, it turned out great! 2. This bread is soft and delicious! Perfect for sandwiches OR with dinner! 3. I was very happy to find that this bread (even when warm) cuts like a dream (and no, my bread knife is nothing great or special). It is just very easy to slice, even thin slices!
Thanks again for such a winning recipe!
I am attempting a loaf with this recipe for the first time now and my bread just isn’t rising. I think my yeast may have been just a bit on the cold side but was still bubbly. I also had a problem incorporating the last three cups of flour. I was able to get about 1.5 cups in the dough but after that the bread just wouldn’t hold anymore and it was acting to dry. Will the bread be messed up from having too little flour?
No, it will be just fine with less flour. Glad you left out the additional flour since it wasn’t working into your dough! Not sure why the bread wouldn’t rise, especially because it seems that the yeast was activated properly. :)
Hi,
I can’t seem to get my yeast to activate :( so I tried another packet of yeast and it only got a bit foamy on the top and I just checked it and it hasn’t really risen?
Help :(
Savannah
Shucks, I’m not sure what’s going wrong except that maybe your water is too hot??
Making this bread for the 1st time & I’m stumped in the very 1st step! 1 1/2 cups of water for 3 cups of flour seems nothing like your pic. The water is far too little for all the flour to combine. Help!
TIA
Rekha
Well, in my pic, I have doubled the recipe. Still though, 1 1/2 cups of water does stir into the 3 cups of flour just fine for me. Maybe just do 2 1/2 cups of the flour at first to see if that works better for you. :)
Thanks, Laura :)
I used a bread machine recipe for whole wheat bread, got my machine all ready to go and nothing. So I had to dump everything out on my cabinet and do it by hand. I had forgotten how. Googled this recipe and your videos are awesome!! I didn’t look for directions until AFTER I had started the bread to rise the first time and I only kneaded my bread about half the time. Next time I think I will use your recipe from the start. Thanks so much for being here when I needed you.
If you “sponge” the bread overnight 12-20 hours, it will be lighter.
Place half the flour, yeast and all the liquid in a stainless or crockery bowl and cover overnight anywhere in the house (assuming 70 deg. home)
In the morning, I add this and the rest of the ingredients to my bread machine and knead on dough for at least 30 minutes.
I spread a slight coat of olive oil in my baking pan with my fingers, then I add a double tablespoon of white flour and using my left hand as a “fence” I spin the pan around fencing the flour in so as to coat everything. Then I bang the pan on my sink upside dowqn and its ready. This method NEVER sticks…period. Let loaf cool 5 minutes before turning it over and popping out the loaf.
added comment: Place bread machine on “dough” setting for added kneading time.
I never bake in my bread machine.
Do you slice the whole loaf at once or as you need it? Trying to figure out how I’m going to keep the bread from going stale but it be easy for the kids to grab a slice for toast.
Laura slices hers as she needs it. I would try to keep it in an air tight ziplock gallon bag to keep it fresh. That has worked for me.
Just made this as my first attempt EVER to make bread from scratch w/o a bread machine. My hubby was impressed! We’re trying to go to all Real Food but I’d been struggling to find a nice sandwich style bread, thanks so much, I think this is it!!
After the first rise, I forgo to punch the dough down. Darn it. Hope it doesn’t make a difference. When I was kneeding the bread the second time, it was not as elastic as your. It would crack, so that you could see rough dough underneath. Did I use too much flour? I have the bread rising in the loaf pans now, but I’d like to know what I did wrong before I start another batch. Thanks for the recipe and the wonderful instructions.
My whole wheat bread is not as fine as yours. Yours looks like my white bread dough. Wonder if that could make a difference?
It’s possible that too much flour was used, so maybe go a little easier next time. I use whole wheat flour made from hard WHITE wheat, which gives it a lighter color and nicer texture, so that may be what makes the difference!
Help! I’ve tried this recipe, and 3 others, and every time, my bread comes out so dense, it looks like a loaf of banana bread, really moist and sticky. What am I doing wrong? I’m so frustrated right now and I want success! Please help!
It sounds like your yeast isn’t activating well to get a good rise. That’s typically what creates a dense loaf. Be sure your water isn’t too hot (or too cold) to kill your yeast. It should be at a temperature that allows you to put your finger into the water comfortably. Make sure the yeast/water/honey is nice and bubbly before adding it to the other ingredients. Knead well to break down the gluten and work the yeast all through the dough. Then allow plenty of rise time – maybe significantly longer than the hour I mentioned in the post. Hopefully that will all help!! Don’t be discouraged. There is a learning curve that comes with making bread!
So, I figured it out!! My problem was twofold. First, I didn’t turn in nearly enough flour, so the dough was incredibly wet. Second, I wasn’t kneading it nearly long enough! Sheesh! I was a professional pastry chef before I had a family, but we never learned whole wheat items (sadly) and it really behaves so differently from processed white flour! Thanks for the advice though! I had success yesterday, after kneading til my arms nearly fell off, lol!
Hi! I stumbled upon this blog quite by accident but I love it!! I am attempting to make this bread but I have a question … when I add the 1.5 cups water to my 3 cups flour .. i just get a doughy mess … it looks NOTHING like yours in the picture … what am i doing wrong?
I don’t think you’re doing anything wrong. My flour/water mixture is generally pretty gooey too. Hopefully as you added the rest of the ingredients, your bread dough turned out just fine!
I’m making this for the third time but each time I don’t have success in activating the yeast. Although delicious, I know the finished product is too dense. What on earth am I doing wrong? Do you use room temp honey? With 1/3 cup honey and 1/4 cup warm water, perhaps it’s not warm enough? I’m using Hodgson Mill active dry yeast packets (especially for whole grains). How bubbly should the mix be? I have about 10-15 little bubbles but it’s not foamy like when I’ve used warm water and sugar. Help! I’m usually a very good cook (but not a great baker) – I’m frustrated :(
Shucks! Yes, I use room temp honey so I can’t imagine what the trouble might be. Maybe try mixing your honey and water together first, to make sure the liquids remain warm enough. Like you said, maybe the honey makes the water too cool.
I made this bread twice now. I used red wheat flour the first time. It turned out a bit dense, but tasted very good. However, my teenage daughter would not eat it (she only eats store bought white). This morning I used white wheat (I’ve been reading about it on this site). She didn’t love it, but she ate two pieces. The dough was much fluffier and the bread turned out less dense and very soft. My goal is to stop buying store-made bread by the end of this year, this recipe will definitely help me with this goal.
I’m having the same problem with my yeast and honey like others have commented. My bread hardly rises and is extremely dense and heavy. My 12 yr old son pretended to use it as a weapon. ;) I’m made sure my yeast was working before I started by mixing some with warm water and sugar. The yeast almost foamed over my measuring cup so I’m sure it was good. It must be a problem with the honey. I just bought my honey locally and know its fresh. I’m guessing I should warm it a bit before I mix it with the water and yeast? My water was warm. Also I think I’m using too much flour for the amount of water. I tried using my kitchen aid mixer and it bogged it down so bad that I shut it off. No need to burn the motor out of it. This is the 2nd time I’ve used this recipe and my bread is rising this time. It is taking a really long time but I can see that it is slowly but surly rising. I can see there really is a learning curve when baking your own bread. Hopefully I can get it figured out before I ruin too many more loaves. At least the dog likes them. ;)
If it was foaming – the yeast/honey mixture was definitely working. Sounds like you needed less flour for yours. Don’t give up – making bread is definitely a learning curve!
Can I use anything instead of the butter? Like olive or sunflower oil?
Either one will work just fine. :)
You’re not alone… I always spank my bread dough! I am making the bread right now and I am so excited! I’ve tried whole wheat bread before and it has always been a disaster. This is looking good!
Have you tried making rolls with this recipe? Do you have to make any changes other than cook time?
I don’t think it would work very well. This recipe is great though: https://www.heavenlyhomemakers.com/whole-wheat-butterhorns-real-food-makeover
This was the first time I have ever made any bread and your recipe and videos were very easy and helpful and my bread turned out wonderful! I didn’t realize it was that easy to make bread. Thanks again :)
For the ones having problems making your bread rise. Take time to re-work the Doe and let set. Some time you have to do this 2 or 3 times. Once you work it and let it set in a warm area in the dark. If it don’t rise re-work the bread and let set again. What cause this? I found its either the Yeast or Flower Mix.
I had to work mine today 2x it set a total 2 hr rise time. But turn out great.
This bread was good. It was nice and light. However it was quite crumbly. But all the breads I have made that are very high in wholewheat are like that. Kind of cakey.
The other issue I have (and again, other recipes were like that, too) is that it is way too sweet for my liking. I will definitely make it again. Next time I will quarter the honey, though.
Thanks for the recipe :)
Hi, couple of questions
I made one loaf and froze the rest
1) I pulled out a frozen one last night and it does not seem to have risen, should I wait? I stuck it in the proofing drawer, and other suggestions?
2) any suggestions on making it moister? It’s a little crumbly
This is the very very first loaf I’ve made that was actually consumed completely, fabulous recipe!
Yes, waiting sounds good – it just takes longer once frozen. I’ve not found a way to make it less crumbly. Although perhaps simply letting it rise a little longer (first rise) will help a little bit. :)
Ok so it never rose. Tasted good though so whatever :)
Can I add more water as needed? The initial amount was too little as it is, and I was barely able to add in a cup and a half of flour. So that made smaller loaves which taste awesome, but never rose out of the pan, they were 3/4 the size I wanted
I am wondering if something in the process of freezing it killed your yeast…Maybe let it sit and rise before tossing it into the freezer next time? I am sure you can add as much water as you need so it works better for you. :)
Thanks a lot for this recipe. I tried this today and this is the first time I am satisfied with a whole wheat bread made at home.
I have been making this for a year now. I have tried MANY recipes and the first time I made this, my husband said, “STOP! This one is it!”
We also make mini-loaves to sell at the local farmer’s market and they go quick!! Everyone who tastes it, wants the recipe.
Thank you for sharing the recipe, Laura!!
This recipe is wonderful! I’ve tried a couple others and they don’t compare! Thank you so much for sharing!
Hello,
Thank you for posting this recipe. I just put my first try in the oven and it smells amazing!
For anyone who is interested, I have dry instant yeast, so I put in 1.5 tsp instead of 2.25 tsp and everything seems to be going smoothly. The honey mix didn’t bubble, but I threw it in anyways and my dough seems to have come out fine.
I do not have a second baking pan, so I cut half the dough into pieces and made dinner rolls in a pie plate. They rose well too, but I’m curious if I should adjust the baking time or temperature. I’m just going to check on them every 10 min or so tonight, but I’d like to know if you have actually done this with success.
Thanks again,
Lisa
I followed the instructions to a “t” and my dough is not rising at all! Do I through it out and start over?
Sorry I’m just now getting to this! How did it go? Did it ever rise? Such a bummer!! :(
I’m not sure if you’ll see this Rebecca, but you might try “proofing” your yeast. Do it in a separate cup. Use water, about a Tbs of sugar and your yeast. Let it sit and if you have no froth after about 5 minutes or even after 10. Your yeast is bad. This happened to me before. If you have a thermometer check your water. Between 105-115 degrees F is the range.
Threw…oops…
Throw…multitasking is not working for me :) .
Thanks, Laura…I started over…I added a tsp of sugar without the honey to the water and yeast. Once it proofed then I added everything together. I sorta cheated. :) Worked much better. I absolutely love your blog! Your recipes and approach to eating healthier is so easy for “real” families. Oftentimes bloggers offer recipes or recommendations that are just not practical for most families. I sincerely appreciate having “you” as a resource. I am making your pancake and sausage muffins for breakfast tomorrow. ;) can’t wait!! Rebecca
Thank you for this recipe. I’m excited to try it, but I have a question. All of the recipes I try produce yummy bread, but it is terribly crumbly. For that reason, my family asks for the nice grocery store bread that isn’t so messy. I would really like to make our own, but am hoping that the texture is better with this one. Any suggestions?
It is naturally going to be a little bit more crumbly than store bought but you can try adding less flour or baking it for slightly less time. The more it dries out the more crumbly it will be. :)
I just made this bread today and it was so good! I did make a few changes though. I used spelt flour instead since that was the only bread flour I had on hand and I used Mel’s Kitchen Cafe’s method for making rolls instead of loaves. Definitely will make it again!
Made this bread today. It was so good. The best whole wheat bread I’ve ever made. I’ve tried making other whole wheat breads without as much success. They were kind of heavy or dry, but this one was not. You made it look so easy. Thanks
I’ve been making this bread for over a year. Like many others, I tried several recipes before I found one my family liked. This year, I had to go back to teaching, which means I don’t have time to make bread from scratch. However, my spoiled family all but refuses to eat store bought bread. In desperation, I’m getting a bread machine. Do you know if this recipe will still work? The machine will make up to a 2 lb loaf.
I’ve never used a bread machine so I can’t say for sure. I think others have used this recipe in a machine – maybe scroll through the comments to see if anyone has experience with it?
I know I’m late but for Rebecca, maybe next time try warming up the microwave and putting dough inside. My dough didn’t rise either after one hour but after putting it inside a warm microwave it doubled in size. Didn’t know dough may not rise if its too cold. My flour was cold due to keeping it in the fridge and it was a cold night in Chicago. I hope this will help anyone else who may have this problem. I’m putting my loaves in the oven now, hope they come out as good as everyone else’s. Thank you for this website, it has changed , my life!
My flour was in freezer, Im thinking thats why its not rising! :(
I had 2 slices this morning! I’m so happy I found your blog.
Can we swap the honey out for sugar? Would it be a straight 1/3c to 1/3c?
You could do an equal swap or you could add more sugar if you prefer.
Do you have any bread recipes for the bread machine???
Thank you :)
No, Laura doesn’t have any bread machine recipes. :)
Whole wheat lacks the gluten to “hold” things together. Try proportionally replacing some of the whole wheat with all-purpose flour. A little experimenting will get you a less crumbly bread without sacrificing the goodness of whole wheat. It’s a personal thing. Our family likes 75% whole wheat and 25% all-purpose.
Another suggestion: Have some fun and experiment with anything you can think of to throw in. A few caraway seeds. Amaretto. Banana extract. Orange extract. Ground horseradish. A little fresh pumpkin flesh. Raisins. Cranberries. ???
On my way to the kitchen to try this! Wish me luck! :) I will let you know how it turns out.
Its been 40 minutes and it hasn’t even began to rise! :(
Try to put your oven on at 200degrees for a few minutes. Then turn the oven off and put your bowl of dough in that. Sometimes mine needs a warmer place to rise than the countertop.
My dough is always so hard I can barely kneed it, why is that?
I would use less flour. It should be soft and easy to work with.
This is the best whole wheat bread recipe ever! I have been baking one loaf, and then refrigerating the other loaf to bake the next day! I like it so much, that I am making it all in advance and letting both loaves refrigerate for at least 24 hours before baking. I am wondering if I do it this was, do I still need to soak the 3 cups of flour in the beginning? Thanks so much for all that you share with us!
I would – simply because it is that first soaking process that releases the gluten in the flour so that the dough is easier to work with and will rise better.
I have been making bread for several years now and my family (my greatest supporters even in my disasters) just love homemade bread. My Achilles heal has always been wheat bread!! NOT NOW!! Thank you so much for publishing your recipes and video tutorials. Every one now loves my wheat bread not just my father (who can eat a brick of bread, what i use to make). Thank you again, and anyone wanting to make great homemade wheat bread stop looking and use this guide and recipe!!
I know this is an old post, but I just came across it and wondered …what kind of bread is that in the bottom picture, all sliced up? It looks like pumpernickel or something darker. Can you share the recipe?
Thank you!!!!!
That is just the Honey Whole Wheat Bread sliced up. :)
Hi, Laura, does one recipe make four loaves or did you double it in the picture?
It is doubled in the picture. One recipe makes two loaves.
I currently don’t have any whole wheat flour. Can I substitute All-Purpose?
Yes, although the measurements may be different.:)
Does the bowl need to be glass or would plastic or metal work as well?
Plastic and metal bowls work just fine.
I think there is problem with to things in this recipe. The first is the ratio of flour to water; way to little liqids for six cups of flour.
Secondly, the recipe says to use 1/4 cup water, 2.25 tsp yeast, and 1/3 cup honey. I tried this five times monitoring the temperatureand going back to the store to get new yeast and going though a whole bottle of honey and half a bottle of molasses before I figured out that the concentration of sugar is way too high.
I went to 1/2 cup water and 1Tbsp of sugar and no problem with any yeast.
Somebody ought to check out these recipes before posting them. Go gack and follow your own instructions. Otherwise folks waste time and money.
I’ve used this exact recipe hundreds of times with success. Sorry it didn’t work for you, but glad you figured out a different way to make it work!
Laura, I’m currently trying to make this bread. I used to make bread with my grandmother in her bread machine when I was a kid. That was always the best bread so I figured I’d try your recipe. I’m having a few problems. I’m not sure if it has to do with the cold temperatures in northern Mass, or low humidity. I’m a south Louisiana girl so these two things are new to me.
Problem 1) when I mixed the warm water with 3 cups of flour, it was not enough water to combine all of the flour and water. I let it sit like you instructed then my dough was already starting to dry out. I was hard and “crunchy” to the touch. I was able to get rid of that when I added the other ingredients, but I was only able to add about 1 1/2 more cups of flower and that was after I had to add more water to the mixture because it refused to form a dough. I just kept getting flowery chunks due to lack of moisture.
Problem 2) I suck at activating my yeast apparently. I tried TWICE! All I got was a very thin foam layer after 20 minutes of waiting and rechecking! I used water from a filter pitcher the second time and just used that yeast, honey, and water mixture to my dough.
My dough is currently rising right now, if it does anything at all. Did I do anything wrong? I followed the directions to the letter. I’m so confused as to why I am having so many problems this early in the recipe.
I’m sure you didn’t do anything wrong. If you are using store-bought whole wheat flour, sometimes that is harder to work with than the freshly ground flour I use in this recipe. You can use a little more water if that helps – or a little less flour at the beginning so that it’s not so dry to start with. Maybe add 2 cups of water instead of 1 3/4. As far as the yeast goes – it’s likely that it is just fine. Or it could be that the water was too hot and killed the yeast? Sometimes mine foams up a ton, sometimes it just makes little bubbles. Either way, it works. :)
My husband takes a sandwich to work everyday so I started making this recipe for him to use. I’m having a lot of trouble with my bread not being soft and staying fresh for longer than a few days. I’ve got a bread box and I’m saving the end piece to keep it pressed against the sliced end. I’ve tried wrapping it in a cloth and putting it in the bread box. I’ve tried putting it in plastic Someone told me about lecithin. Have you ever used it in your recipes? Any ideas?
Figured it out. 45-50 minutes was way too long to bake the bread in my oven. Cut it to 30 and it is as soft as ever. Sad that my husband actually ate four bricks before getting soft bread. Gotta love him.
Haha! I am so glad you figured it out. Since Laura hasn’t tried lecithin I was going to recommend cutting down the baking time. I am glad it all worked out for you! :)
Do you know how I would find out the sodium content? I’m assuming that homemade bread would be less sodium than the store bought, but trying to calculate exactly how much sodium for my husband is a little tricky cooking from scratch. I can’t exactly eliminate the salt from bread either! Store bought breads can be very high in sodium, even tortillas. He has a medical condition that requires low sodium.
Yikes, I have no idea, sorry!
Could you not look and see how much sodium a teaspoon has and then whatever amount you use calculate that?
1,872 mg of sodium (googled). That is for sea salt, table salt is higher at over 2,300 mg of sodium
That is 1 tsp.
I will roughly say 117 mg of sodium per slice. Depends on how many slices you get out of one loaf.
This recipe works great. I am letting the dough sit for 1/2 hour before adding the yeast. I am mixing the dough for about 5 minutes in my Bosch. I am letting the dough rise for about 1 hour and then I form into bread loaves. I let them rise about 35 min. Now when I get ready to bake the loaves of bread, the top of the bread has split open. How do I stop the bread loaf from splitting?
Sounds like the second rising was a little too long, which is usually what causes a spit. :)
For the one saying family didn’t like texture. I found a post on natural dough conditioners at tammysrecipes.com and it made it “less crumbly”. Made this and it was fabulous, but didn’t print or write down recipe. Grrrr…Made another batch with different recipe and it didn’t come close to this one! This is definitely a keeper!!! Thank you for sharing your life and lessons! Blessings.
I just baked this recipe today and I was so impressed! It’s my second time baking bread and I was nervous to make it 100% whole wheat, but this worked perfectly! I am vegan and used Earth Balance instead of butter (but I do eat honey, and I kept that in the recipe) and it worked wonderfully. Delicious!
Just in case anyone is curious, 1 loaf of this bread has about 1560 calories. So just divide that by the number of slices (varies depending on how thick or thin you slice it) and you have your calories/slice! :)
I was wondering if I could substitute coconut oil in the place of the butter? If so, exact amount? We can not have dairy or soy along with a long list of other things. Thanks in advance !
Yep, just sub it one for one. :)
I did and it was awesome! I love this recipe thank you!
If your recipe does not specifically state “freshly ground wheat” are we to assume that you created a recipe using fresh ground wheat? I am asking so I know if I need to adapt a recipe of yours for fresh ground wheat. Thanks.
Laura uses freshly ground wheat flour to create her recipes. No adaptations needed. :)
Hi, Would this work well as sandwich bread to send with my kids for school lunch? Does it slice well?
It’s a little crumbly, so it may be a little frustrating in a lunch box.
Dear Laura,
I am 12 years old, and I made this recipe, and it came out PERFECTLY!!!!!! I LOVE the look and smell and taste of homemade bread, and this is the best I’ve ever tasted!!!!!!!! AMAZING! Thank you so much for making this cooking website. My mom and I really enjoy your recipes. Thanks again! :)
LOVE this! I don’t suppose you have a picture of your bread you could email me? I’d love to share this story along with a picture of your bread on my blog. I checked out your blog too. It’s great!
oh, and if you want to check out my blog that I made, (It is not a cooking blog) here is the link:
http://mosshomes.wordpress.com
thanks, bye!
Hi Laura! Thank you for this wonderful recipe!
I wanted to share that I have worked out how to use the bread machine for the mixing, kneading, and the first rise. I do still bake in the oven.
I use a Zojirushi BB-CEC20 that has customizable HOME MADE cycles.
I posted it here:
http://cookgardensew.com/2014/09/maple-wheat-bread-in-the-zojirushi/
I did modify the recipe to use maple syrup and coconut oil, as well as a small amount of white flour, but I can’t see any reason it wouldn’t work as written here with the same settings I use.
Just thought I would share for anyone wondering how to do this in a bread machine. It really is delicious!
Wonderful recipe. The bread looks so yummy …m new to baking breads and have been trying by hand in baking them for past one month but seem to face a problem..no matter how I store them they dry out ..the moment they are fresh out of oven they have a soft inside n hard crust but that’s it…i roll it in kitchen towel ,have put in a box..i don’t know what I am doing wrong :(
My bread also gets dry within a few days, so I don’t think you’re doing anything wrong. Fresh, homemade bread without preservatives will not last more than a few days (that’s actually a good thing, because it proves you’re using/eating REAL ingredients).
If the bread gets too dry before we’ve eaten it all, I turn the leftovers into breadcrumbs which I store in the freezer for recipes that call for breadcrumbs. :)
Can you please share if you can freeze and for how long? Thanks
Yes. Allow it to cool completely, then wrap well and put into a freezer bag. It will freeze up to about a month. I do find that the frozen/thawed bread isn’t as soft as fresh, but it’s still good!
I like your site and you have a wealth of valuable information. I am a wheat farmer in Montana and I have recently started a web site selling our own grain. If you mill your own flour or are thinking of doing it please check it out. I will have more products in the coming months. We try to keep my prices reasonable and have free shipping in the USA. Go to mariasriverfarms.com and get to know us,check out the pictures of our farm and like us on Facebook.
Thanks
I am wanting to try this recipe but we are a dairy free house for an allergy. Will this recipe work with dairy free butter?
Should work fine. Olive oil would work well too. :)
Hi! I was wondering, if I were to use instant yeast instead, what should I do?
I would stick with the same methods described here for instant yeast. :)
Hi. I have another question. If I use wholemeal flour instead of whole wheat, is there any differences and if there are what should I do? Whole wheat flour is hard to find here.
I’m not familiar with wholemeal flour but I’m assuming it would work like whole wheat flour?
Have you every made a whole wheat English Muffin Bread? Or even regular English Muffins? I’m thinking a whole loaf would be simpler with only the loaf pan to wash, just slice and toast. I love the chewiness of it. The recipes I’m finding include a combo of white and whole wheat flours but I’m wanting something healthier and wonder if you may have something like that in the works.
I tried this bread because I wanted to use whole wheat flour and this looked easy. I had a weird problem. I got Certified Organic honey (product of Brazil, hmmm) and made the mix with the water, honey and the yeast to proof it. Nothing. After a half hour I added more yeast from a different batch. Nothing. After another half hour, added MORE yeast, still nothing. Took a packet from the first batch and proofed it in plain water – success, nice and foamy after a few minutes. I think the honey was killing the yeast, no idea how or why. I ended up adding the yeast and water and then adding honey from another jar in with the butter and salt and mixing it in that way. It seems to be rising now (after I mixed in some flax, sunflower, hemp hearts and pumpkin seeds chopped up). Anyone have the experience with honey killing the yeast?
Weird, I’ve never heard of that happening!!
Hi Laura!
I make bread all the time, usually using my Kitchenaid, because I’m making more than two loaves to freeze, however, I definitely have kneaded bread a few times in my day. I can’t wait to try this with my children. A few things, yes, wetter is a word, it’s the comparative adjective for the word wet (so: wet, wetter, wettest) and also, I’ve found I usually get a better rise if I use my dough cutter at first, and cut up the dough and then bring it back together several times, it seems to not need a ton of flour during the last kneading stage. I’m sure sure that’s clear, but you can look it up if you’re interested. It’s just a different way to knead the bread. Thanks!!