Heavenly Homemakers

Encouraging women in homemaking, healthy eating and parenting

  • Home
    • About
    • FAQs
  • Recipes
    • Bread and Breakfast
    • Condiments
    • Dairy
    • Main Dishes
    • Side Dishes and Snacks
    • Desserts
    • Gluten Free
    • Instant Pot
    • Crock Pot
    • Heavenly Homemaker’s Weekly Menus
  • Homemaking
    • Real Food Sources
  • Store
  • Contact
    • Advertise
    • Disclosure
    • Privacy Policy
  • Simple Meals
  • Club Members!

How To Make Almond Butter

August 18, 2015 by Laura 44 Comments

This post may contain affiliate links. For more information, please see our disclosure policy.

Almond Butter recipe? Yeah, I’ve got an Almond Butter recipe. I think.

Confessions of a scatter-brained homemaker:

On Monday, I decided to try making a new variety of No-Bake Cookie Bites. I was out of Almond Butter, so I considered that it was probably as easy to make as Peanut Butter, which I make all the time. Heading to my computer to search for how to do it, I realized: I think I have done this before and maybe even already have a post written about it. So I searched my own website. Sure enough. I told us all how to make Almond Butter back in 2012.

This makes me wonder what else I’ve already taught us how to do that I don’t even remember. Maybe I’ve told us all how to save thousands of dollars or how to save hours of time. What else have I forgotten?!?

Well anyway. I am loving the No-Bake Cookie Bites so much that I will be actually using homemade Almond Butter more often, which will likely help me remember that I know how to make it. In case you also forgot that I have already taught us how to make this easy spread, I am re-posting the tutorial for us all here today. May we all remember and use these instructions often. May our brains be for us instead of against us. May we never forget when we walk into a room, what in the world we walked in to get.

Homemade Almond Butter

Yum

So here we go, loud and clear so that we don’t forget:

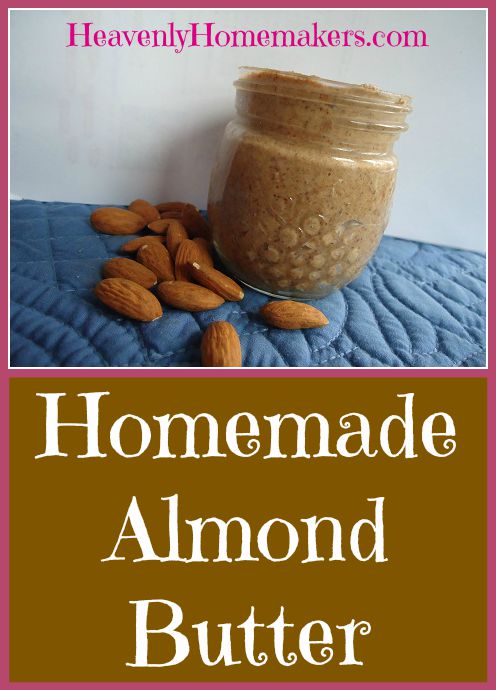
Here’s How to Make Almond Butter!

Step One: Pour 2 cups of almonds into a food processor. I have found that 2 cups of almonds creates one full cup of almond butter. I don’t recommend putting more than 2 cups of almonds into your food processor at one time. The process takes a while, and the more almonds you have, the longer it will take.

Step Two: Place lid on food processor and turn it on. Plugging it in is always a plus as well. This will be very loud at first, so warn your household.

Step Three: After processing almonds for two to three minutes, use a spoon to scrape down the sides of your food processor and shift around the almonds.

Step 4: Continue to process, but stop and scrape and stir almonds around from time to time to aid in the butter making process.

Step 5: You’re getting closer! Process, scrape, stir, and process some more. Continue until the almonds have become the almond butter you’ve always dreamed of. Because yes, we all do spend much of our time dreaming of perfect almond butter, do we not? (Not me, apparently, because I forgot the stuff existed.)

And there you go – lovely, smooth and creamy almond butter.

What other nut butters have you made? Did you remember that I’ve already told us all how to make this three years ago? I sure hope your brain works better than mine.

P.S. I order organic almonds from Braga Farms. They are a wonderful company to work with and offer high quality nuts. Almond Butter will stay fresh in the refrigerator for several weeks.

Heavenly Homemaker's Club Members: Access your homepage and all your fantastic resources here! Not a member yet? Please join us!

Have You Tried Making This Amazing Peanut Butter Yet?

March 21, 2014 by Laura 10 Comments

This post may contain affiliate links. For more information, please see our disclosure policy.

You will love how delicious this Homemade Super Creamy Peanut Butter is. If you haven’t tried it yet, do it! Our family eats it by the spoonful. :)

Here’s what D’Ann said about the peanut butter this week:

I am truly in love with this recipe! I simply scoop the palm shortening into the food processor with an ice cream scoop that equals 1/4 cup, add the maple syrup, salt and lastly the nuts. I whirl it for 5 minutes, and the end result is pure yummy magic! I make 3 jars at a time and just store them in my pantry. I’ve never had an issue with it going or tasting bad. I also store mine in the cabinet, and it spreads and acts like brand name pb. My family is in love. :)

Super Creamy Peanut Butter

Yum

Sounds like a great kitchen project for this weekend, huh? Find the recipe here.

Heavenly Homemaker's Club Members: Access your homepage and all your fantastic resources here! Not a member yet? Please join us!

How to Make Beef Broth

February 27, 2014 by Laura 27 Comments

This post may contain affiliate links. For more information, please see our disclosure policy.

There’s nothing very beautiful about pictures of soup bones and vegetables floating in water. And yet, here I am again, just like the time I showed you all the pictures of my chicken carcasses. Some people create adorable collages of their children. Me? I spent time yesterday crafting a collage of my beef broth. Isn’t it precious?  Take note of the fatty bubbles floating along at the top of the jar. I’m so proud.

Homemade Beef Broth

Yum

Beef Broth is as fantastic for your body as Chicken Broth. There are so many minerals we need that we can get from beef bones, such as calcium, phosphorous, magnesium, sulfur, and potassium – all in their natural, beneficial, and digestible form. The vegetables you add to the pot of broth are invaluable. And the best part? Making homemade broth is one of the most inexpensive ways to provide nourishment to yourself and to your family members.

Look into buying Beef Soup Bones. There’s still a little meat on the bones (more on that later), but mostly you’re just going to pay a small amount for a package of bones. Cook those mineral-filled-bones in a pot with water and veggies, and you’ve just created several jars full of nutritional goodness for a very tiny amount of money.

Here’s how I make Beef Broth. As you can tell from my collage above, my process is very fancy and exact:

1. Place thawed or frozen beef soup bones into a large kettle or stock pot.
2. Add, to your heart’s content, chunks of onion, carrots, leeks, celery and/or any other veggie you enjoy in your broth.
3. Fill your pot with water.
4. Sprinkle liberally with sea salt.
5. Cover and simmer pot of water/veggies/soup bones for 4-6 hours. Or more. Or less. Or whatever works for you.
6. Remove soup bones from pot. Pull cooked beef off the bones with a fork, and set meat aside for soup or salads.
7. Blend liquid and vegetables together until smooth.
8. Allow broth to cool, then refrigerate or freeze until you are ready to use it to make soup, cook rice, or add it to a recipe.

That meat you’ll pull off the bones? It tastes incredible because it’s right by the bone and has been cooked low and slow. I love it in chef salads. I also snack on it as I’m pulling it off the bones.

Why do I blend all the veggies into the broth? Because after 6 hours of simmering, they are mushy. When I blend them in, they just become part of the nutritious broth. Depending on the number of carrots I use, my broth might turn orange. No matter. It’s delicious.

Once you’ve made Beef Broth, what can you do with it? You can use it to make Beefy Vegetable Soup. You can also use it in any recipe that calls for chicken broth – like my Cheeseburger Soup or Pizza Soup. Cook rice in broth for extra nourishment and flavor in a side dish – or add that wonderful rice to Cheesy Beef and Rice. Follow my instructions for Chicken Noodle Soup, but instead use beef broth and the meat that came off the bones for Beef-n-Noodles.

What other ideas do you have? What ways do you use Beef Broth? 

Isn’t this a wonderful way to be healthy and save money at the same time?!

Heavenly Homemaker's Club Members: Access your homepage and all your fantastic resources here! Not a member yet? Please join us!

Super Creamy Peanut Butter – Step Aside Skippy!

February 4, 2014 by Laura 86 Comments

This post may contain affiliate links. For more information, please see our disclosure policy.

For everyone who can’t get their kids to break away from Skippy or Jif. To all who can’t get used to the taste of plain, natural peanut butter. To each person who doesn’t want to struggle to spread homemade creamy peanut butter onto a piece of toast. This recipe is for you! (And for me, because while I love homemade, natural peanut butter – I can’t get enough of this new recipe!)

You’ve read the ingredients in Skippy and Jif, right? Unreal. Literally.  It does have some peanuts in there somewhere, but it mostly has hydrogenated oils and high fructose corn syrup. Poor Peter Pan. I doubt he wanted his good name tarnished like this.

And now, to replace that popular grocery store item, I bring you this completely real food, non-hydrogenated, nothing scary, all natural, wonderful, spreadable, smooth, creamy, delicious peanut butter.

The first day I made this, I licked so many spoonfuls I lost track of trips back and forth to the kitchen. After one such trip to the kitchen, once I finished what was on my spoon, I actually found myself sucking the life out of the spoon, apparently in hopes that more of the deliciousness would secrete out of the metal? Then I realized what I was doing and went back to the kitchen for another spoonful. Someone just bring me the jar!

Super Creamy Peanut Butter

I was not alone. Matt and the kids acted like this was candy. Maybe we’ll make it into a sandwich someday, but for now, we’re getting our protein fix one spoonful at a time. Ah-mazing. Here is the recipe already:

Super Creamy Peanut ButterYum

5.0 from 1 reviews
Super Creamy Peanut Butter - Step Aside Skippy!
 
Save Print
Author: Laura
Ingredients
  • 1 cup natural peanut butter (tutorial link below)
  • 4 Tablespoons palm shortening
  • 1 - 1 1/2 Tablespoons real maple syrup
  • ¼ teaspoon sea salt
Instructions
  1. In a medium saucepan, melt and stir together all four ingredients until smooth and creamy.
  2. You can make this more or less sweet by adding more or less maple syrup.
  3. Pour mixture into a pint sized jar.
  4. Chill until thickened (about 2 hours).
  5. Spread on a sandwich, eat with a spoon, eat with a spoon, eat with a spoon, or eat with a spoon.
3.4.3177

Make Your Own Natural Peanut Butter!

Wondering where to get Palm Shortening?  My favorite source is Tropical Traditions. Spectrum brand Organic Vegetable Shortening (which is made with 100% palm oil) is also good, and can be found at Amazon, or health food stores. Just do not use regular vegetable shortening (like Crisco) – otherwise you’re right back at the not-so-good-for-you peanut butter.

Over the weekend, I made about 8 cups of this peanut butter. I figured my food processor was already messy, my palm shortening was already out, so why not make this effort worth my while? I now have 4 pint sized jars of this peanut butter in my fridge. Well, 4 pints minus several dozen spoonfuls.

Alright – what do you think? Will your family love this?? (The answer is yes.)  What kind of peanut butter do you like at your house?

Heavenly Homemaker's Club Members: Access your homepage and all your fantastic resources here! Not a member yet? Please join us!

Homemade Cream of Mushroom Soup

November 15, 2011 by Laura 118 Comments

This post may contain affiliate links. For more information, please see our disclosure policy.

Learning to make Cream of Mushroom Soup will be a fantastic tool to have in your real food kitchen tool belt!

Just in case you lose count while reading the following sentence, I used the word “cream” or “creamy” six times, because apparently I like these words and like to overuse them. And also because once I realized I was doing it, I exaggerated on purpose:

When I shared my Creamy Chicken and Rice Casserole recipe, I told you that I don’t usually make cream soups to replace the canned cream soups called for in many creamy recipes, but instead substitute straight cream to make the dish creamy.

(Someone give me a synonym for “creamy” to enhance my future sentence writing creativity.)

However, I have a great recipe for an easy one dish meat and potato meal that I hadn’t made for years because I wasn’t sure how to make it without the cream of mushroom soup. For this, straight cream just wouldn’t cut it. I need to make the soup.

Homemade Cream of Mushroom Soup

Therefore, for all one of my recipes that need cream of mushroom soup, here is how I make it:

Homemade Cream of Mushroom SoupYum

Homemade Cream of Mushroom Soup
 
Save Print
Author: Laura
Ingredients
  • ½ cup sliced mushrooms
  • 3 Tablespoons butter
  • ¼ cup organic corn starch or arrowroot powder
  • 4 cups milk, divided
  • 1 teaspoon sea salt
  • pepper to taste
Instructions
  1. Begin by sauteing mushrooms and butter until mushrooms are tender.
  2. In the meantime, shake the cornstarch or arrowroot powder in a jar with 1½ cups of milk.
  3. Use a whisk to mix the milk mixture into the sauteed mushrooms, stirring constantly at medium heat.
  4. Slowly add remaining milk, salt and pepper.
  5. Stir with a whisk until smooth and thick.
3.4.3177

You probably could have figured out how to do this step without a picture, but when have I ever missed a chance to take a great photo of a jar?

Ooh, Ahh

This recipe will make around three cans worth of cream soup. I haven’t done it before, but I would imagine you could substitute celery for the mushrooms to make cream of celery soup instead. If you have extra soup that you don’t need, this can be frozen.

This recipe tastes great in my One Dish Meat and Potato Casserole!

What recipes do you make that require cream of mushroom soup?

Heavenly Homemaker's Club Members: Access your homepage and all your fantastic resources here! Not a member yet? Please join us!

Homemade Peach Syrup (made with unprocessed sugar)

October 2, 2011 by Laura 13 Comments

This post may contain affiliate links. For more information, please see our disclosure policy.

We usually top our pancakes with real maple syrup or homemade applesauce. Sometimes peanut butter and jelly. Or peanut butter with maple syrup. Or honey. Or if we sprinkle a few mini chocolate chips into the pancakes, we don’t really need syrup at all. But last week when we had some fresh, local peaches in our kitchen, I made a quick and healthy homemade peach syrup that is oh-my-goodness good.

You need exactly two ingredients to make this: peaches and sucanat. The two together cook to form a syrup. No water necessary. Can you believe how easy this is?

Homemade Peach SyrupYum

Homemade Peach Syrup (made with unprocessed sugar)
 
Save Print
Author: Laura
Ingredients
  • 3 fresh peaches (or 2 cups frozen)
  • 2 Tablespoons sucanat or brown sugar
Instructions
  1. Slice peaches into a saucepan.
  2. Stir in sucanat and cook on medium heat, stirring occasionally until the peaches are tender and the ingredients have formed a syrup.
3.4.3177

You can add a few shakes of cinnamon if you like. Of course I love doing that in the fall when everything seems to need to smell and taste like cinnamon.

I love how the fruit and sugar cooked together form a syrup naturally. This works with both fresh or frozen fruit. No need to thaw the frozen fruit before cooking!

Homemade Peach Syrup


Another variation of this Peach Syrup recipe is…

Easy Raspberry Pancake and Waffle Syrup

Easy Raspberry Pancake and Waffle Syrup - Only Two Ingredients!

It’s the same idea – just sub out peaches for raspberries. Or use blueberries instead. Or strawberries. Or any combination of peaches or berries to make a multi-fruit syrup. See how easy this is?

In case you need them (and of course you do want them), here are our family’s favorite pancake and waffle recipes:

  • Whole Wheat Waffles
  • Quick Mix Pancakes
  • Peanut Butter Pancakes
  • Pumpkin Pancakes

What’s your favorite way to top pancakes and waffles?

Heavenly Homemaker's Club Members: Access your homepage and all your fantastic resources here! Not a member yet? Please join us!

Making Homemade Mayonnaise (is not my gift)

June 21, 2011 by Laura 71 Comments

This post may contain affiliate links. For more information, please see our disclosure policy.


Who knew making homemade mayonnaise for the Heavenly Homemakers Recipe Challenge would tempt me to say naughty words? I held myself back though, and merely gave dirty looks to the ingredients in my blender that were not even trying to become mayonnaise and through gritted teeth hissed, “Would you guys emulsify already!?!?!?”

It wouldn’t have been such a big deal, except that I attempted to make mayonnaise at least four times before I could accomplish “mayonnaise emulsification”. We went through a lot of olive oil in the process, and subsequently, a lot of tuna.

Why tuna? Well, I wasn’t going to waste all those ingredients every time I had mayonnaise emulsification failure. Instead, each time, I stirred the runny, stubborn ingredients into a few cans of tuna, added some of my home canned pickle relish and called it lunch. It worked, all but one time. Yes, there was one time I did have to throw the ingredients out. That was the time I was so determined to whip the ingredients long enough and hard enough to become mayonnaise that the ingredients got so hot inside my food processor that the eggs got cooked, causing scrambled eggs to float in my olive oil. Mmmm. Gross as it is, I just had to take a picture – because I’m weird like that:

A perfect example of what not to do.

Regarding a healthy mayonnaise recipe, I do have one to share with you, and I’m sure that after all my previous, inspirational statements, you’re all ready to jump right in and give this a go. Based on all my trial and error, I have a few tips I think you’ll find helpful.

  1. I believe that if I had an immersion blender, this process would work much better. But I don’t have one and I refuse to buy one just to make mayo. If you do have an immersion blender, save yourself some frustration and use it for this.
  2. Pour the oil into the running blender so slowly you think you might fall asleep while pouring. About the time you think you’re pouring slowly enough, slow down.  Slow dripping oil is key for making mayonnaise.
  3. Get your eggs at room temperature before starting this process. 

Homemade MayonnaiseYum

2 egg yolks
1/2 teaspoon sea salt
1 Tablespoon vinegar
1 teaspoon sucanat
1/2 cup olive oil

Place the egg yolks, salt, vinegar and sucanat into a blender and run on high speed for about a minute. S-l-o-w-l-y pour the oil in while the blender is running. I’m talking, let the oil drip into the running blender at a horridly boring pace. Just stand there, with the blender running, dripping oil for several minutes. Don’t get impatient or you’ll be making tuna.

My mayo turned out very yellow in color because of our lovely free-range chicken eggs, which are rich with nutrients. 

This mayonnaise did taste very good, as well it should have after all the work it took to figure out how to make it. But I will never be known as the Mayonnaise Queen, nor will I ever be asked to speak at the Heart of Mayonnaise Convention. I’m also pretty sure I shouldn’t be your “I’m having trouble making mayonnaise” questions go-to gal. I do not believe making mayonnaise is my gift, nor do I wish to become a professional mayonnaise maker. 

But, I am pleased to say that I figured out a healthy mayonnaise recipe and now I can move on to try and conquer the remaining recipes in the Heavenly Homemakers Recipe Challenge.

Have you conquered mayonnaise before? What’s your favorite use for mayonnaise? Ever given your mayonnaise dirty looks?

Heavenly Homemaker's Club Members: Access your homepage and all your fantastic resources here! Not a member yet? Please join us!

Healthy Homemade Ketchup (finally!)

May 25, 2011 by Laura 134 Comments

This post may contain affiliate links. For more information, please see our disclosure policy.

I think I’ve been working on a homemade ketchup recipe for about forty years. (I have actually not reached the age of forty yet, but I am rather fond of exaggerating and I feel like I’ve been experimenting with ketchup for like totally forever.)

It’s taken quite a bit of trial and error to find a recipe that we think tastes good. So many recipes just don’t quite taste ketchupy enough for me. This recipe I’ve finally settled on is one I found and adapted from Happy in Dole Valley. I’m happy to say that this is a very easy recipe to make. Tastes good…healthy…and easy. Yes, this is the kind of recipe I like to share with you.

During my experiments, one of the toughest challenges was to sweeten the ketchup in a way we liked. I didn’t want it too sweet, but it did need to be a little bit sweet – and not too tomato-ee. (I’d like to see the words ketchupy and tomato-ee become a part of the dictionary someday, wouldn’t you?)

I tried making ketchup with raw honey to sweeten it, and found that the taste was too strong. Regular ol’ sucanat (dehydrated cane sugar juice) is a little crunchy in this recipe, so I finally figured out a great way to sweeten our homemade ketchup:  Grind the sucanat in the blender like you’re making this healthier, unprocessed powdered sugar…then add it to your ketchup ingredients. Easy and perfect!

Healthy Homemade KetchupYum

Healthy Homemade Ketchup (finally!)
 
Save Print
Author: Laura
Ingredients
  • 7 ounces of tomato paste
  • ⅓ cup water
  • 2 Tablespoons vinegar (I used distilled coconut vinegar)
  • ¼ teaspoon onion powder
  • ¼ teaspoon garlic powder
  • ¼ teaspoon dry mustard
  • pinch of cinnamon
  • pinch of cloves
  • pinch of allspice
  • pinch of cayenne pepper
  • ¼ teaspoon sea salt
  • ⅛ cup sucanat
Instructions
  1. Whisk ingredients together until mixed well and smooth.
3.4.3177

I’ve found that if you grind the sucanat in the blender to make it less “crunchy” it works better.

Make french fries, get them nice and crunchy, salt them well with sea salt and give me a call.

Defining “a pinch”: When a recipe calls for “a pinch” of something, I usually put in about 1/8 teaspoon – an amount you could “pinch” between your fingers if you were to reach into the spice jar and pull some out. I don’t really like putting my fingers in to pinch my spices. But you go right ahead if you want to.

The true test with our Homemade Ketchup Experiment:  Did the kids like it?

All of my kids love ketchup, but one particular son of mine eats ketchup on everything:  eggs, green beans, broccoli… He’s also my pickiest kid (which is why he eats ketchup to get his veggies down). I  hesitantly put this homemade ketchup on his plate with a nice helping of homemade fries. He ate it. He loved it. He said, “Is this the homemade ketchup?” and I said, “Yep” and he said, “Wow it’s really good!”

Score! We have a winner!

Homemade Ketchup Recipe

Now that I’ve conquered ketchup, I’ll move on to some of the other recipes on the Heavenly Homemakers Recipe Challenge list. I’ve gotta say, I’ve been working on mayonnaise and it is about to kill me. I can not get a homemade mayonnaise to thicken even a little bit and it’s beginning to make me mad. Those of you who make mayo…what in the world is the secret to getting the ingredients to actually thicken into mayo? Ketchup took me forever to figure out, and now the mayo.  I apparently have condiment issues.

Well anyway, what’s your favorite use for ketchup? Please tell me it isn’t green beans, like my son.

Heavenly Homemaker's Club Members: Access your homepage and all your fantastic resources here! Not a member yet? Please join us!

Homemade Teriyaki Sauce (No MSG or HFCS!)

February 15, 2011 by Laura 51 Comments

This post may contain affiliate links. For more information, please see our disclosure policy.

Ever noticed how tough it is to find dressings and sauces that don’t have MSG (Monosodium Glutamate) and HFCS (High Fructose Corn Syrup)? MSG, by the way, is a flavor enhancer that is made up of a bunch of chemicals I can’t pronounce and a bunch of scary stuff I don’t want to know about. You can read all the big words here.

I’ve been so excited each time I figure out how to make a new homemade salad dressing or condiment (see the whole list of healthier condiment recipes on our site)! Making your own condiments is not only much healthier, it’s often quite a bit cheaper too. And, lo and behold, these items are easy to make.

Shall we now all take a moment and enjoy a collective sigh of wonderment? Yes indeed recipes that are healthy, cheap and easy. All at the same time.

The beauty of homemade condiments too is how delicious and flavorful they are…all by themselves. We do not need to add MSG and HFCS or BGNJ to make our food taste good. (I made that last one up just for kicks and it was very fun.)

Well, apparently that was my little “rant” for the day. Try homemade condiments. They taste so good and pure.

And now for the Homemade Teriyaki Sauce recipe!

Teriyaki SauceYum

Homemade Teriyaki Sauce (No MSG or HFCS!)
 
Save Print
Author: Laura
Ingredients
  • ¼ cup tamari soy sauce
  • 1 cup water
  • 1-2 teaspoons freshly grated ginger or dry ground ginger (more or less to taste)
  • 2 Tablespoons honey
  • 1 minced garlic clove
  • 2 Tablespoons organic cornstarch
  • ¼ cup cold water
Instructions
  1. Combine 1 cup water, soy sauce, honey, garlic and ginger in a saucepan and bring to a boil, stirring constantly.
  2. Dissolve cornstarch in ¼ cup cold water and add to sauce.
  3. Stir constantly and allow the sauce to thicken.
  4. If the sauce is too thick, add a little bit of water or soy sauce to thin.
3.4.3177

(I use Organic Tamari Soy Sauce from OliveNation which is gluten and MSG free!) We LOVE this Teriyaki Sauce on chicken wings.

Homemade Teriyaki Sauce recipe

And with that, the Heavenly Homemakers Recipe Challenge continues. I’ve almost got another recipe ready to share. I’m not going to tell you what it is, but I will tell you that it starts with chocolate and ends with milk. Otherwise, I’m not giving any hints.

Heavenly Homemaker's Club Members: Access your homepage and all your fantastic resources here! Not a member yet? Please join us!

Homemade French Dressing

August 22, 2010 by Laura 38 Comments

This post may contain affiliate links. For more information, please see our disclosure policy.

I figured out a French Dressing recipe that includes only real food ingredients and avoids high fructose corn syrup! It also means I can enjoy Taco Salad the way I used to – again without the high fructose corn syrup. Mmm, real food. I love revisiting my favorites and eating them in a healthier way!

french_dressing_2

Back in the day when I didn’t know what high fructose corn syrup was or understand that it was bad for us…I used to make a killer taco salad with Catalina Salad Dressing. Man that stuff tasted good!

I’d mix up a big bowl of lettuce, taco seasoned meat, shredded cheese, chopped tomatoes, chili beans, crunched up tortilla chips – and toss it all with Catalina. Such a perfect summer supper (or dinner, or whatever).

After a little experimenting, I came up with a yummy homemade French salad dressing that tastes even better than the store bought ever tasted! It’s so easy to put together, it’s inexpensive to make, and it tastes wonderful in my taco salad! It’s a blast from the past, only better.

Homemade French DressingYum

Homemade French Dressing
 
Save Print
Author: Laura
Ingredients
  • ¾ cup ketchup
  • 2 Tablespoons sucanat (you can substitute brown sugar if you want)
  • ½ cup olive oil
  • ¼ cup red wine vinegar
  • ½ teaspoon garlic powder
  • ¼ teaspoon liquid smoke
  • 1 Tablespoon ground celery seed
Instructions
  1. Put all ingredients directly into a pint sized jar.
  2. Put the lid on and shake it well.
  3. Refrigerate.
3.4.3177

I recommend Muir Glen Organic ketchup because guess what? It doesn’t include high fructose corn syrup.

Easy Taco Salad with homemade French Dressing

Remember that you can also find recipes for homemade Ranch Salad Dressing, Italian Salad Dressing and Thousand Island Salad Dressing in the Condiments Page of my recipe section!

And also…if that’s just too much salad for ya…you can find a recipe for Chocolate Caramel Truffles on the Desserts Page. I’m always willing to accommodate. ;)

Heavenly Homemaker's Club Members: Access your homepage and all your fantastic resources here! Not a member yet? Please join us!
« Previous Page
Next Page »

Join Our Community!

 Facebook Twitter E-mail Instagram Pinterest

Popular Posts

~ Will All of the Real Moms Please Stand Up?
~ Easy! Stir-and-Pour Whole Wheat Bread
~ How to Make Gatorade
~ 31 Real Food Breakfast Ideas
~ Dear Teenage Girls...
~ When Mom Takes a Step Back
~ The Inexpensive Health Insurance We Love!
~ Let's Talk Real Food Grocery Budgets

Check out our latest posts!

  • Big Family Food and Fun: May 3-9, 2026
  • Help Your Kids Become Independent in the Kitchen!
  • Big Family Food and Fun: April 26-May 2, 2026
  • Big Family Food and Fun: April 19-25, 2026
  • Big Family Food and Fun: April 12-18, 2026
Home  ~  Simple Meals  ~  Club Membership  ~  Shop  ~  Privacy Policy  ~  Disclosure  ~ Contact

Copyright © 2026 · Beautiful Pro Theme on Genesis Framework · WordPress · Log in